Paleo Coconut Flour Pancakes.

This healthier take on pancakes using coconut flour, applesauce, coconut oil, and eggs will get your day started on the right track!

IMG_1960

Good morning! Grab a seat and settle in for some pancake stories.

Growing up, pancakes were my favorite breakfast treat. My mom would make them on Saturday mornings occasionally and I promise nothing got me out of bed faster than the smell of fresh pancakes!

Unfortunately, there’s not much going on nutrition-wise in traditional pancakes, so I’ve been on the hunt for a healthier pancake for a while. I also needed to find a substitute for flour to keep them gluten free.
That’s where these Coconut Flour Pancakes come in!

IMG_1972

The first time I had these were with some friends on a ski trip. One of my good friends made these for us one snowy morning and I was so impressed with how delicious (and filling!) they were! Unlike old-school pancakes, these will actually fill you up and keep you full for hours thanks to fiber-filled coconut flour and a good protein-fat ratio from eggs. Yup, there are 5 eggs in these pancakes!

Let’s talk texture. These pancakes are soft and somewhat spongy, but in a good way. They’ll soak up whatever oil (coconut oil or butter) you use to cook them in, and whatever topping you choose to add. I’m somewhat of a pancake purist when it comes to toppings: just real maple syrup, please!
But honestly? Can I tell you a secret??
I think they’re pretty good plain.
When we were skiing, I ate some leftover for lunch on the slope and thought they were just fine the way they were!

IMG_1957
One last little trick: coconut flour requires a few minutes of rest so it can soak in some of the moisture of the batter. 5 minutes is all you’ll need. I whipped these up in my Vitamix in no time. The time-consuming part is cooking all the pancakes! Don’t forget, if you need to keep them warm while you finish cooking all the pancakes, put the ones that are ready in the oven on low, covered with a damp towel. The damp towel will help keep them from drying out in the oven!

I hope you make these Coconut Flour Pancakes for your family soon! One batch makes abouttttt 12-14 pancakes depending on what size you make them. Enjoy!

Coconut Flour Pancakes

Ingredients:

  • 5 eggs
  • 1 cup all-natural applesauce
  • 1/2 cup coconut flour
  • 1 tsp baking powder
  • 1/2 tsp cinnamon
  • 1/4 cup melted coconut oil or butter
  • 1 tsp vanilla
  • add-ins like bananas, blueberries, chocolate chips (optional)

1). In a blender, combine all of the ingredients except for the optional add-ins. Let the batter sit for 5 minutes to thicken.

2). Heat a large skillet (or pancake griddle) to medium heat. Add a small amount of coconut oil or butter to the skillet or griddle. Use a 1/4 cup measuring cup to drop the batter. Do not overfill. Let the pancakes cook for 2-3 minutes per side. These pancakes take a little bit longer than traditional pancakes, so be patient and keep an eye on them. You probably won’t see a lot of bubbles on the surface like you would with regular pancakes. Don’t rush them too much!

3). Top with whatever toppings you’d like and enjoy!

Yield: 12-14 pancakes. (I got 13) Approximate Nutritional per Pancake: Calories: 110 Carbs: 7g Fat: 7g Protein: 3g Fiber: 2g P+:3 Recipe adapted from here.

Gluten-Free Soft-Batch Chocolate Chip Cookies.

These Soft-Batch Chocolate Chip Cookies are so soft they taste like they just came out of the oven, and they’re so good no one will know they’re Gluten-Free!

IMG_1860

Today’s National Donut Day, but I much prefer chocolate chip cookies over donuts, so I’m popping in with an awesome cookie recipe for you today. I think these are the best gluten-free chocolate chip cookies I’ve had yet! Now, let me go ahead and say this is one of those cases where gluten-free does NOT equal healthier. There’s plenty of real sugar, butter, etc. If you’re looking for a “healthified” gluten-free chocolate chip cookie, you might want to try these.

If you’ve been reading the blog for a while, you know chocolate chip cookies are my favorite dessert.
And you also know I am super picky about my chocolate chip cookies.
I want them SOFT. Not crispy, not crunchy, and definitely not super crumbly.
I found the perfect chocolate chip cookie recipe, but then last year I found out I had a wheat allergy, and I’ve been looking for a replacement ever since.
Ladies and gents, this is it!

IMG_1863

They hold up together really well, but aren’t hard at all. The edges are just sliiiight crispy, but the rest of the cookie is perfectly soft. Sticking the cookie dough balls in the freezer before baking was key in this recipe. Also, as with any cookie, you want to take them out of the oven when they still seem slightly underbaked because they continue baking while cooling on the pan.

IMG_1867
These cookies will stay fresh for up to 2 days in an airtight container.  I mean, obviously, they were best fresh out of the oven, so you’ll definitely want to have one then. I don’t even need to tell you that though because honestly…does anyone actually bake cookies and not taste one fresh from the oven? I didn’t think so.

Gluten-Free Soft-Batch Chocolate Chip Cookie

Ingredients:

  • 1 7/8 cup gluten-free all-purpose flour (I used King Arthur’s All-Purpose GF mix)
  • 1 teaspoon xantham gum (check your flour mix–if it’s already listed as an ingredient omit it)
  • 6 1/3 teaspoons corn starch
  • 1/2 teaspoon salt
  • 1 teaspoon baking soda
  • 2/3 cup sugar
  • 1/2 cup light brown sugar
  • 6 tablespoons butter, at room temperature
  • 5 tablespoons vegetable shortening, melted and cooled
  • 1 tablespoon pure vanilla extract
  • 1 egg + 1 egg yolk both at room temperature, beaten
  • 1 cup semi-sweet chocolate chips, mixed with 1 teaspoon cornstarch

1). Preheat the oven to 325F. Line a baking pan or cookie sheet with a silicone baking mat or parchment paper. Set aside.

2). In a large bowl whisk together the GF flour, xantham gum, corn starch, salt, baking soda, and sugar. Once that’s all blended, add the light brown sugar. Make sure there are no clumps.

3). Create a well in the middle of the dry ingredients by pushing them up towards the sides of the bowl. Add the following ingredients, stopping to mix well after each one: butter, shortening, vanilla, egg, and egg yolk. The dough should be thick and soft. Add the cornstarch-coated chocolate chips and mix well. (Bonus: there’s no risk of overworking the dough with gluten-free flour!)

4). Roll about 2 1/2 Tablespoons of dough into balls and place on the lined cookie sheet, about 2 inches apart. DO NOT flatten the balls–leave them rounded. Place the baking sheets in the fridge for 1 hour or in the freezer for 10 minutes.

5). Remove from fridge/freezer and bake for 12 minutes. Again, the center of the cookie will appear underbaked. Let them cool for at least 10 minutes on the cookie sheet–they will continue baking as they cool. Remove from the cookie sheet and let them finish cooling on wire racks. Store in an airtight container for up to 2-3 days. Enjoy!

Servings: about 20. Approximate Nutritional information per Serving: Calories: 216 Carbs: 30g Fat: 10g Protein: 2g Fiber: 1g Sugar: 18g Points+: 6 Recipe from here.

5 Ingredient Easy Garlic Butter Roasted Mushrooms.

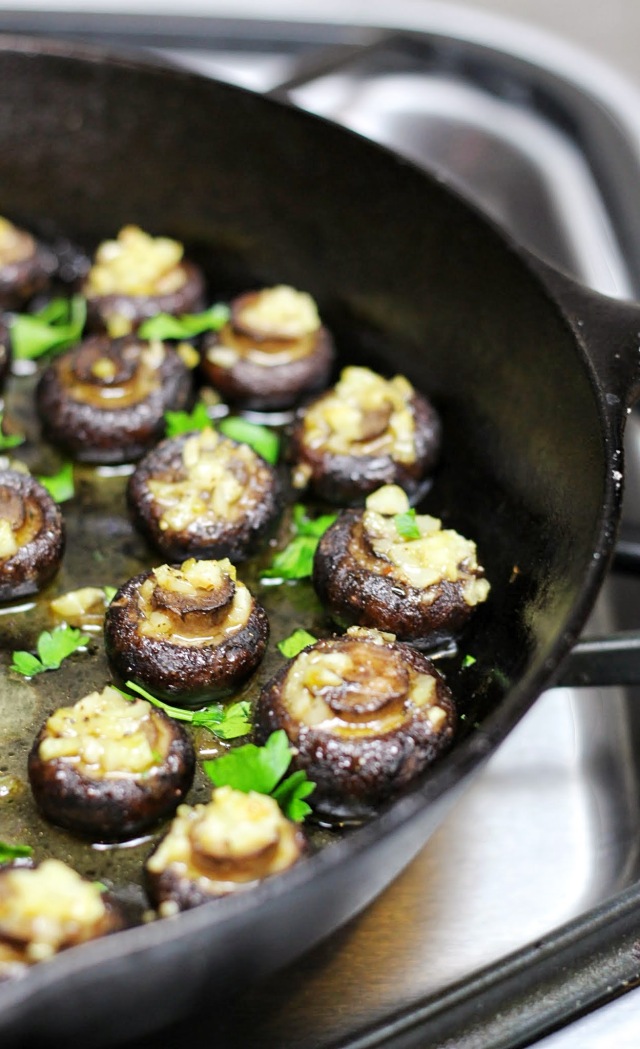
Garlic Butter Roasted Mushrooms are a perfect appetizer or side dish–and they’re so easy to make!

IMG_1884

Mmmm. Mushrooms.
They’re so polarizing.
It seems like people either fanatically love them or absolutely loathe them.
Me?
I’m on Team Mushrooms all the way.
I’m the person who actively seeks out the dish with mushrooms on the menu.
And I’m guilty of taking the mushrooms off my husband’s plate because he won’t eat them.

So, I assume if you’re still reading that you’re on Team Mushrooms as well.
In which case, YOU NEED TO MAKE THESE GARLIC BUTTER MUSHROOMS.
They’re sooooo garlick-y and butter-y and mushroom-y. Yep. I’m making up words over here.
That’s how good they are.

IMG_1881

There are five (count ’em!), FIVE simple ingredients to make this dish.
Two of them are salt and pepper.
Do those even count? No? So really just 3 ingredients, then.
Garlic + butter + mushrooms = magic.

The big trick with the mushrooms comes to cleaning them.
You probably already know this, but you can’t rinse them under water.
Instead, you need to use a wet paper towel and gently wipe down each one.
It’s a little time consuming, but it’s worth it in the end!

IMG_1880 (2)

Two more things to note about the recipe:
#1: Trim the ends of the mushrooms so they’re flat and even with the rest of the mushroom. This will help the garlic stay on top of them instead of falling in between them.
#2: You will want to mince up your garlic as tiny as you possibly can so it’ll stay on the mushrooms.

5 Ingredient Easy Garlic Butter Roasted Mushrooms

Ingredients:

  • 16 oz white or baby bella mushrooms, cleaned with a wet paper towel
  • 1/4 cup butter (I used KerryGold grass-fed butter, but you can even make them vegan by using Earth Balance!)
  • 4 cloves of garlic, minced as finely as you can
  • salt
  • pepper

1). Place a large cast iron skillet in the oven and preheat it to 400F. If you do not have a cast iron skillet, you can use a pie pan or a casserole dish, but you will not preheat the oven with either of those inside.
2). Using a small knife, trim the ends of the mushrooms so they’re flat and even with the rest of the mushroom. Remove the cast iron skillet from the oven and carefully arrange the mushrooms in it.
3). Place the butter and garlic in a microwave safe bowl and microwave for about 30 seconds or until melted. Spoon the garlic butter over each mushroom cap. Make sure to try to keep the garlic on top of the mushroom instead of letting it fall in between. Season the tops with salt and pepper.
4). Roast for about 25-30 minutes until tender, basting them about halfway through the cooking time. Serve and enjoy!

Servings: 4. Approximate Nutritional Information per Serving: Calories: 131 Carbs:5g Fat: 12g Fiber: 1g Protein: 4g Points+:4 Recipe originally from here

Strawberry & Goat Cheese Salad with 3-Minute Strawberry Balsamic Dressing.

 Up your salad game with this restaurant-style Strawberry & Goat Cheese Salad! A quick but impressive 3-minute Strawberry Balsamic Dressing ties it all together.

IMG_1893

May = Strawberries!
And, also the end of the school year. Womp womp. It’s always bittersweet!
I have been creating lots of delicious recipes for you the past month, so get ready for lots of cooking and baking inspiration to come your way this summer!

Today I’m sharing TWO summer ideas with you. One is a salad, and the other is a 5-ingredient dressing that will be ready in 3-minutes or less AND will compliment the salad perfectly! I even have a bonus mini-recipe for candied almonds at the bottom of the post!

IMG_1890

So, this salad. Just look at it! Swoon. I love adding fruit to my salad for a little natural sweetness, and ripe strawberries are the perfect way to achieve that. This Strawberry and Goat Cheese Salad is perfect for serving company or just enjoying on a weeknight. It’s simple. Ready?

IMG_1887

Spring mix.
Ripe strawberries.
Sliced/slivered almonds for some fun crunchy texture.
My 3-minute strawberry balsamic dressing (recipe below).
Crumbled goat cheese aka chèvre.
The goat cheese is slightly tangy but suuuuuuuuper creamy and compliments the strawberries perfectly. SO. GOOD.

IMG_1900

And then there’s this strawberry balsamic dressing. I’ve been making it for about 6 years now and it never disappoints. My husband isn’t the biggest fan of strawberries but he LOVES this dressing.

IMG_1896

This dressing is sooo quick and easy to make (3 minutes max!). There’s absolutely no reason to buy dressing when this is so easy to make. And, unlike some pre-packaged fruit dressings, there are no food dyes here; that beautiful pink color comes straight from 5 whole strawberries! I love how naturally colorful food can be.

IMG_1901

You’ll have to use some sort of blender to blend the strawberries together with the other ingredients. I used to use my immersion blender, but now that we have a Vitamix, I use it instead. It cleans itself so it’s just a little more convenient! But seriously, use whatever blending appliance you’ve got. Even a food processor should work nicely here.

Along with the strawberries, you’ll add olive oil, balsamic vinegar, lemon juice, a little honey and a touch of salt. Blend it up and BOOM. Done! I like to store my homemade dressings in mason jars so I can give it a quick shake before serving, but you can store it however you want in the fridge.

3-Minute Strawberry Balsamic Dressing

Ingredients:

  • 5 large strawberries, ends cut off
  • 2 Tablespoons balsamic vinegar
  • 2 Tablespoons olive oil
  • 1-1 1/2 Tablespoons honey (use 1 Tablespoon unless your berries aren’t very sweet, in which case add a little more)
  • 1/4 tsp salt

1). Combine all ingredients in a food processor, immersion blender, regular blender, etc. Blend until smooth.

2). Serve immediately or store in the fridge. Enjoy!

Servings: about 8. Approximate Nutritional Information per Serving: Calories: 46 Carbs: 4g Fat: 4g Protein: 0g Fiber: 0g Points+: 1
Recipe courtesy of Audrey’s Apron.

Strawberry and Goat Cheese Salad

Ingredients:

  • Spring mix
  • Ripe strawberries, hulled and quartered
  • Sliced or slivered almonds*
  • Crumbled goat cheese
  • Strawberry Balsamic dressing from above

1). Add all ingredients to a bowl (I eyeball the measurements depending on what size crowd I’m feeding) and toss together. Serve immediately!

*Note: If you want to get really fancy, make your own candied almonds by sprinkling 3 T brown sugar in a skillet over medium heat. Add 1 T water as it heats up to help it dissolve. Watch carefully as the sugar and water come to a boil, then, when the water burns off, you will notice a change in the bubbles. Instead of being wet, they will start to thicken and turn darker. That’s when you add 1/4 cup slivered almonds. Toss them around, let them cool, then add them to the salad!

Recipe courtesy of Audrey’s Apron.

French Dijon & Basil Potato Salad. (GF/DF)

 A simple French-inspired potato salad perfect for taking to a cookout or picnic this summer! 

IMG_1329

Sooooo I have a little-known fact about myself I’m going to share with you on this beautiful spring day.
Are you ready?
I really don’t care for mayonnaise-based salads.
Especially potato salads, but this also applies to pasta salads, tuna salads, etc.
I know, I know. It’s not a popular opinion. But hear me out.
One reason I don’t care for them is because they’re so heavy, but also because they aren’t conducive to al-fresco dining. You have to keep them cold and refrigerated otherwise you run the risk of making yourself or someone else sick.
Having to worry about that adds stress to what is supposed to be a stress-reducing experience!

That’s where this dijon and basil potato salad comes in. I swapped the mayo for a simple vinaigrette, and topped it off with fresh basil. You’re going to love it! I took it to a function recently and everyone went craaaazy over this simple salad.

Bonus: it happens to be gluten-free, dairy-free, egg-free, vegetarian and vegan, so hopefully everyone can enjoy it!

IMG_1331

Instead of mayonnaise, you’re going to make a simple vinaigrette with all the usual characters (olive oil, vinegar, dijon mustard, salt, and pepper). I add all the ingredients in a mason jar and shake it up, but you can whisk it together in a small bowl.

Quick trick I learned from my mom and grandma: pour the vinaigrette over the potatoes while they’re still warm so they absorb all the flavors. Then, you can finish it off with freshly chopped basil and it’s ready to go!

IMG_1327

I used baby red potatoes, but you can use yukon gold or whatever you have on hand! I hope you try this dish for your next picnic or cook out!

French Dijon and Basil Potato Salad

Ingredients:

  • 3lbs baby red potatoes, washed and quartered
  • 1 cup of fresh basil, chopped
  • sea salt and black pepper, to taste

For the vinaigrette:

  • 1/3 cup olive oil
  • 1/4 cup red wine vinegar
  • 1 tsp dijon mustard
  • 1/2 tsp sea salt, to taste
  • 1/2 tsp freshly ground black pepper

1). Place the quartered potatoes in a large pot with water and bring to a boil over medium-high heat. Reduce heat and simmer for about 15 minutes or until the potatoes are tender when pierced with a fork. Remove from heat and drain the water.

2). While the potatoes are boiling, place all the vinaigrette ingredients in a mason jar and shake until well combined. (You can also whisk them together in a bowl).

3). Let the potatoes cool. You want them warm, but not hot. Place them in a large bowl and season them with salt and pepper. Pour the vinaigrette over them. Add the basil and toss to combine. Taste and re-season with more salt or pepper. Enjoy!
*Note: This dish is best served warm or at room-temperature, but you will need to refrigerate any leftovers.

Servings: about 8. Approximate Nutritional Information per Serving: Calories: 201 Carbs: 27g Fat: 9g Fiber: 3g Protein: 3g Points+: 5 Recipe adapted from here. Adapted recipe courtesy of Audrey’s Apron.

Grain-Free Chocolate Chip Cookies. (GF, DF)

Soft and chewy chocolate chip cookies that are gluten-free and are sweetened naturally instead of with refined sugar! All the ooey-gooey goodness of traditional chocolate chip cookies, but a little bit healthier.

IMG_1612

Valentine’s day is Saturday! Got any plans to make a sweet treat for your loved ones?

My all-time favorite dessert is chocolate chip cookies. So, you can imagine my frustration when I found out about my wheat allergy over the summer and realized I would no longer be able to enjoy my beloved chocolate chip cookie recipe. I had to find a replacement. Stat.

This recipe is an excellent alternative to my aforementioned traditional wheat-filled chocolate chip cookie recipe. The first time I made it, I was seriously skeptical. I mean, look at the ingredients! Can almond flour really work here? Can honey bind it all without even using an egg?

The answer: yes.

IMG_1602

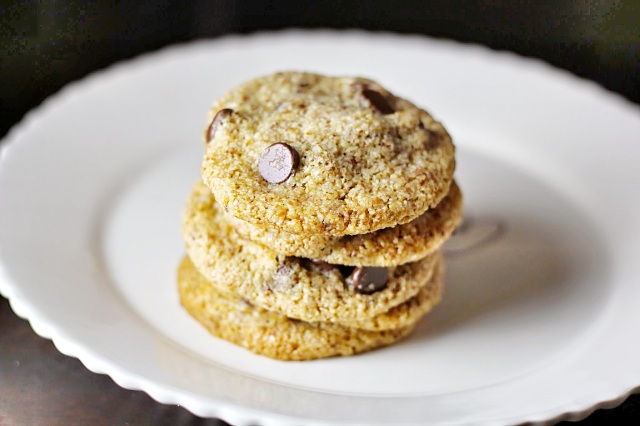
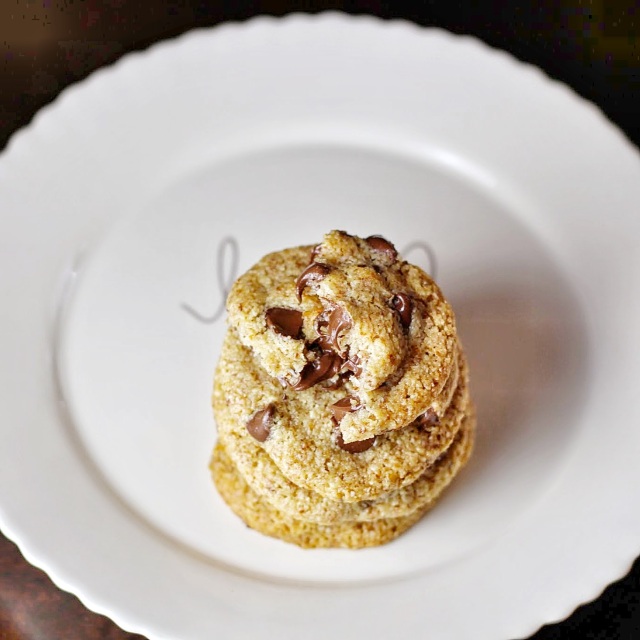
These cookies are super chewy, which is exactly the way I love them.
And they’re soft.
Really soft. In fact, don’t even think about attempting to eat one as soon as you take the pan out of the oven because they will appear underbaked. This worried me at first, but sure enough, after they cooled for a while they firmed up and could be held just fine. (By the way, underbaking is one of the tricks for making my original chocolate chip cookies amazing, and it works here too!)

IMG_1597

Obviously if you’re making cookies you realize there’s going to be some serious sugar-intake happening, but I do appreciate that these cookies use honey instead of refined sugar. Honey is still a form of sugar, but if you buy good quality, raw, local honey, you are at least also getting some nutrients from the sweetener. The flavor of the honey does come through a little bit, but I love honey so that did not bother me at all. If you don’t like honey (is that possible?), then these might not be the cookies for you!

IMG_1619

A note on the almond flour–I used Trader Joe’s almond meal/flour. I am not sure how well any other brand would work. Almond flour can vary greatly depending on what brand you purchase, so just be aware!

Grain-Free Chocolate Chip Cookies

Ingredients:

  • 1 3/4 cups almond flour
  • 1/4 cup honey
  • 1 tsp vanilla extract
  • 3/4 cup chocolate chips (use enjoy life for dairy free)
  • 1/4 cup softened butter (coconut oil for dairy free)
  • 1/4 tsp sea salt
  • 1/4 tsp baking soda

1). Preheat the oven to 350F. Line a cookie sheet with silpat liner or parchment paper.

2). In a large bowl, mix all ingredients except chocolate chips together until well-incorporated. Add in the chocolate chips.

3). Scoop about 1 tablespoon of cookie dough and place on the prepared baking sheet. Keep 2-3 inches of space between cookies. Gently press down on the cookie dough to flatten each cookie slightly.

4). Bake for 6-10 minutes, depending on your oven. The cookie should be slightly golden on the bottom and will appear underbaked, but they will finish baking as they cool.

5). Important: cool for 10-15 minutes on the cookie sheet before enjoying! You absolutely must let them cool or else they will be too soft to handle. Enjoy!

Yield: about 19 cookies. Approximate Nutritional Information per cookie: Calories: 135 Carbs: 11g Fat: 10g Fiber: 1g Protein: 2g Sugar: 9g Points+: 4. Recipe originally from here.

Gluten-Free Oat Waffles.

Easy, light and fluffy waffles made with oat flour that the whole family will love!

IMG_1652

Happy Saturday!

Tell me: waffles or pancakes?

It seems like everyone has a preference.

Personally? A few years ago I would have said pancakes > waffles. I’m really not sure why, other than the fact we didn’t have a waffle maker growing up and my mom would make pancakes for a special breakfast. In fact, the only thing I wanted when I got home from months of studying abroad in college was pancakes!

Then I got married. My husband LOVES waffles. A very good friend of ours generously gave us a waffle maker over the summer, and waffles have been requested occasionally ever since. Usually I make him traditional waffles, but I was curious to try this gluten-free version a few months ago and it has never let me down! Now? Pancakes = waffles.

IMG_1644
I love that this recipe is so simple. No crazy combination of flours here, just one: oat flour. You can make your own, which is what I did since I already had oats in the pantry, or you can purchase some. If you have oats and a food processor/blender, it’s super easy to make your own–just blend away!

An important note: make sure to account for the 10 minute of batter-resting time. I almost forgot this step once, but thankfully I realized it before I started pouring the batter in the waffle maker! It’s absolutely crucial to let the batter rest so the oat flour absorbs excess moisture.

IMG_1653

Have fun with the toppings! You can’t go wrong with classic maple syrup (just be sure to get a high quality syrup if you go that route!), but I also love waffles with a small dollop of raspberry or strawberry preserves. My husband’s favorite is a spoonful of my crock pot apple butter, which adds a nice punch of warm spices. Then there’s always the savory route…chicken and waffles, anyone?

So, what are you waiting for? Go make a special breakfast for your family this weekend!

Gluten-Free Oat Waffles

Ingredients:

  • 1 1/2 cups oat flour (if making your own, you’ll need about 2 cups of oats blended together to yield 1 1/2 cups of oat flour)
  • 2 teaspoons baking powder
  • 1/2 tsp salt
  • 1/4 tsp cinnamon
  • 3/4 cup room-temperature milk (I used unsweetened vanilla almond milk)
  • 5 tablespoons of melted coconut oil or butter
  • 2 large eggs
  • 2 tablespoons room-temperature maple syrup
  • 1 teaspoon vanilla extract

1). In a medium bowl, mix together the oat flour, baking powder, salt, and cinnamon.

2). In a small bowl, whisk together the milk, melted coconut oil/butter, eggs, maple syrup, and vanilla extract.

3). Add the wet ingredients to the dry ingredients. Stir until combined. Let the batter rest for 10 minutes to allow the oat flour to absorb excess moisture. Start preheating the waffle iron at this point.

4). Mix the batter once more then add it to the hot waffle iron. Once golden and cooked through, remove from the waffle iron then repeat with more batter. You can keep them in a 200F oven to keep them warm, if you’d wish, and they should also freeze beautifully. Enjoy!

Recipe yields about 5 square waffles (as pictured above). Serving size: 1 waffle. Approximate Nutritional Information per Serving: Calories: 210 Carbs: 15g Fat: 15g Protein: 6g Fiber: 1g Sugar: 6g Points+: 6. Recipe originally from Cookie and Kate.

Coconut Key Lime Energy Bites + 2 Year Blog Anniversary! (GF, DF, Paleo)

Slightly tangy but sweet, these coconut lime energy bites are a perfect light dessert or healthy on-the-go snack option!

IMG_1790

My blog turns 2 today, and I’m celebrating with a healthy little sweet treat: coconut key lime energy bites! If you’ve been reading Audrey’s Apron from the beginning, you know this blog idea had been a long-time dream of mine since college and I finally put it into motion 2 years ago today. A lot has changed in the 2 years that I’ve been blogging. I’m thrilled that so many of you follow this little cooking journey of mine. And it really does make my day when you comment that you made a recipe and loved it!

The biggest change on the blog this year? Probably my photography skills! It’s still a work in progress, for sure, but at least I’m not taking pictures with my phone camera anymore! OH the horrors! My ever-supportive husband got me a real, legit DSLR camera for my birthday this year and it has been so fun using it!

So, I just want to say THANK YOU for following, reading, commenting, tweeting, etc. I love sharing our culinary successes together!

IMG_1785

Back to this yummy recipe. I found these to be a perfectly delicious paleo substitute for key lime pie. They’re much healthier, and bite-sized, so that’s a win!

The coconut is totally optional, by the way.
I just love how it makes them look sort of like little snowballs.
Or truffles.
Yum!
So for all you coconut-averse readers, just know it’s more for aesthetics and you can definitely leave it off.

A word of wisdom: make sure that your dates are in fact pitted before you throw them in your food processor and turn it on.
Otherwise it will begin to jump wildly all over the counter while making an AWFUL noise.
Don’t ask me how I know, just promise me you’ll double check, ok? Ok.
P.S. The dates I bought from Costco most definitely did have pits in them. #IwishIwouldhavedoublechecked.

IMG_1792

So the great thing about this recipe is that the food processor does all the work for you! Throw in some cashews, almonds, dates (pitted!), lime zest & juice, and turn it on! Then all you have to do is form the mixture into little balls and roll them into coconut if you so choose.

Pack them in your lunch, serve them as dessert, or keep a few in your purse for emergencies–these chewy energy bites are perfect for whenever you need a quick boost!

Coconut Key Lime Energy Bites

Ingredients:

  • 1/2 cup cashews
  • 1/2 cup almonds
  • 1 1/2 cups medjool dates, pitted
  • Zest and juice from 2 limes
  • 1/4 cup unsweetened shredded coconut for rolling, optional

1). In a food processor, add the cashews and almonds. Pulse until the nuts are finely chopped.

2). Add the dates and lime zest and juice. Pulse until the dates are finely chopped and the mixture begins to clump together.

3). Scoop about a tablespoon of the mixture out and roll it into a ball. Roll in shredded coconut if desired, then repeat with remaining mixture. Store in an airtight container on the counter for up to 4 days, or in the fridge. Enjoy!

Servings: about 15. Approximate Nutritional Information per Serving: Calories: 74 Carbs: 9g Fat: 4g Protein: 2g Fiber: 1g Points+: 2 Recipe adapted from here. Adapted recipe courtesy of Audrey’s Apron.

Roasted Red and Sweet Potatoes with Rosemary. (GF)

Red potatoes and sweet potatoes roasted together with rosemary make a simple, easy side dish perfect for any meal.

IMG_1728

I recently fell in love with the flavor combination of rosemary and sweet potatoes. There’s something so earth-y and wonderful about the two that make them go together so well. It’s a simple combination, really, but not one that I made at home before, and this dish lived up to all of my expectations. It’s hard to go wrong with potatoes though, am I right?

Even though I 110% adore sweet potatoes, for whatever reason I equally wanted red potatoes when I made this dish, hence the decision to mix them together. This also made my husband happy since he typically prefers red potatoes over sweet any day. All that to say, every potato lover in your family will be happy when you serve them these! You can also use regular white potatoes if you prefer, or even use only sweet potatoes!

Reason #274 why I love this dish: I love any excuse to gather fresh rosemary from our back yard. If you’ve ever wondered if you should plant a rosemary bush, the answer is a resounding yes! It’s so convenient to never worry about running out.

IMG_1722-001
These potatoes roast low and slow in the oven, leaving you with plenty of time to focus on the main dish while they do their thing in the oven. It’s brutally cold and windy out, and this side dish screams warm and cozy, which is exactly what I want in my life right now! I hope you enjoy it!

Roasted Red and Sweet Potatoes with Rosemary (GF)

Ingredients:

  • 1 Tbsp grass-fed butter (or olive oil for dairy-free/vegan)
  • 2 Tbsp olive oil
  • 2 large sweet potatoes, peeled and cut into 1 inch cubes
  • 1 1/2 lbs red potatoes, cut into 1 inch cubes
  • 1 1/2-2 Tbsp fresh rosemary, chopped
  • 1 1/2 tsp sea salt and 1/2 tsp freshly ground black pepper, or more to taste

1). Preheat the oven to 350F. Place the butter in a 9×13 pan and put it in the oven for a couple minutes to melt the butter. Remove from oven and add the remaining ingredients, tossing well to ensure even seasoning.

2). Roast for about an hour, stirring 2-3 times, until the potatoes are golden and tender.

Servings: about 8. Approximate Nutritional Information per Serving: Calories: 159 Carbs: 26g Fat: 5g Protein: 3g Fiber: 3g Sugar: 4g Points+: 4. Recipe adapted from here.

The Best of Audrey’s Apron in 2014: The 10 Most Popular Recipes!

Here are the top 10 most popular recipes of 2014 based on your views and comments! Some of my personal favorites are in the mix (especially #1, #2, #3, and #10).

I hope you will use this list to jump start your cooking in 2015 with some new recipes! Click the title above each picture to view the recipe. Thanks for a great 2014!!

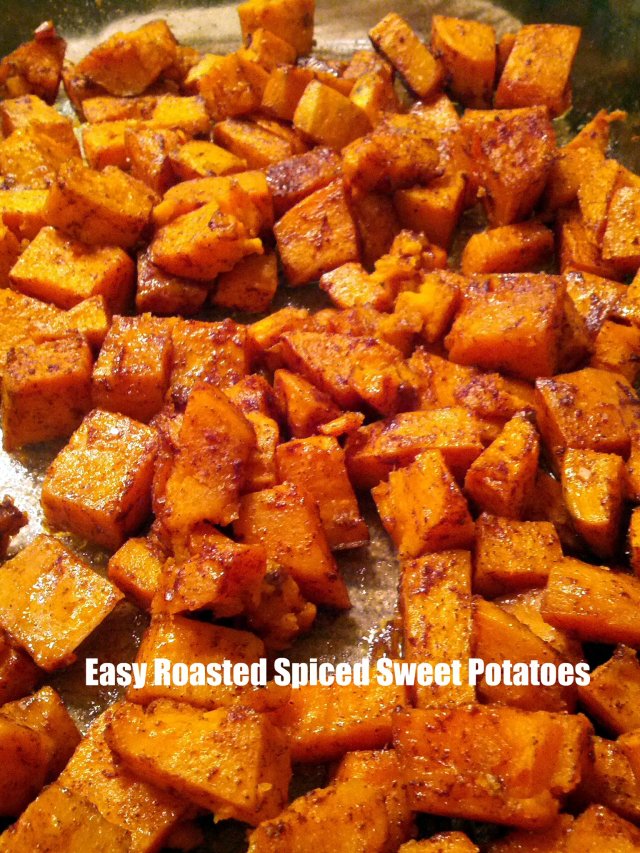
1). Roasted Spiced Sweet Potatoes (GF, DF, Vegan)

photo-6

Wow, did this recipe ever take off this year! This was by far the most popular post, and for good reason–these are one of my favorite ways to prepare sweet potatoes. One comment said, “These were so good! It was like eating CANDY!”

2). Parmesan Upside Down Baked Potatoes (GF)

photo-1

This recipe was the #1 most popular recipe of 2013, and I’m not surprised to see it in this year’s top 10 post because it is awesome! Sandy left a comment that said, “I made these tonight as part of a Pinterest meal blog post. They were very good. I added the rosemary, which is a favorite of mine with potatoes. Thanks!”

3). Lemon and Herb Marinated Grilled Chicken (GF, DF, Paleo)

IMG_20130417_175817

Hands-down, this is my go-to favorite marinade for grilled chicken. It’s super easy (5 ingredients!) and light–no oil needed here!

4). No Bake Peanut Butter Energy Balls (GF, DF)

IMG_20130804_203042

Don’t let the terrible photo fool you–these are SO, so good!! You probably have everything you need in your pantry to make these sweet treats right now. 1 bowl and 6 basic ingredients is all you need!

5). Southwestern Grilled Sweet Potato Salad (GF, DF)

IMG_0947

Love all the colors in this salad! It’s a great side dish or main dish for vegetarians/vegans. It’s also a fabulous option for a potluck or picnic as it does not need to be refrigerated like a traditional potato salad.

6). Baked Chicken Taquitos (GF if using corn tortillas)

IMG_20130730_183409

Eat them whole as a main dish or cut them in half for an appetizer–either way they are amazing! I love this recipe and I think your whole family will, too! Bonus: they reheat well!

7). Pappasito’s Fajita Steak Marinade (DF)

IMG_20130502_192127

This simple marinade mimics the flavors of the famous Pappasito’s fajita steak! It’s delicious and so simple–just 3 ingredients!

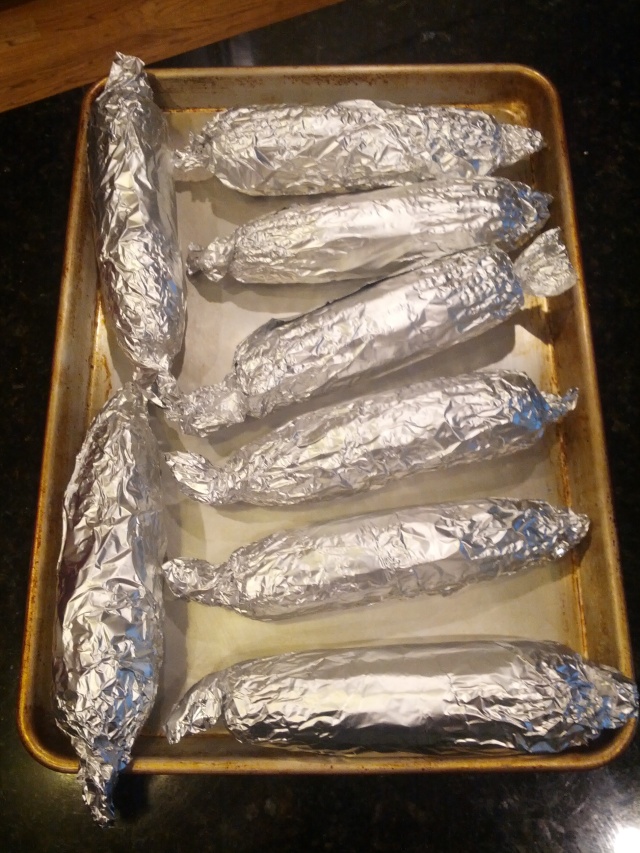
8). Oven Baked Corn on the Cob (GF, without butter: DF, Vegan)

IMG_20130914_191029

A great, easy way to perfectly cook corn for a crowd! It’s ideal for cookouts because you can leave the corn wrapped in foil to keep it warm after it’s cooked.

9). Roasted Parmesan Sweet Potatoes (GF)

IMG_20140103_193551191

Love this simple way to cook sweet potatoes! It’s easy and delicious.

10). Creamy Garlic Salad Dressing + A Salad Idea (GF, DF, Paleo, Vegan)

IMG_20130617_185843

That title says it all–this salad dressing is quick, easy, and healthy! I’ve made this numerous times whenever I want a change from my balsamic vinaigrette.

And there you have it: the top 10 most popular recipes for this year! Thank you so much for following along my cooking journey–I’m looking forward to a great 2015!