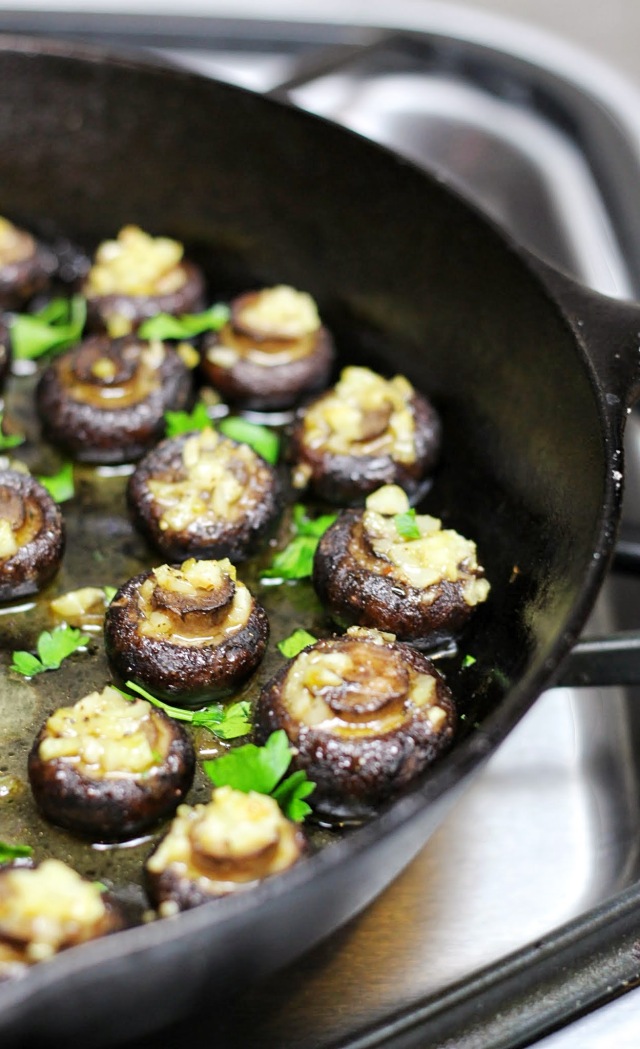
5 Ingredient Easy Garlic Butter Roasted Mushrooms.

Garlic Butter Roasted Mushrooms are a perfect appetizer or side dish–and they’re so easy to make!

IMG_1884

Mmmm. Mushrooms.
They’re so polarizing.
It seems like people either fanatically love them or absolutely loathe them.
Me?
I’m on Team Mushrooms all the way.
I’m the person who actively seeks out the dish with mushrooms on the menu.
And I’m guilty of taking the mushrooms off my husband’s plate because he won’t eat them.

So, I assume if you’re still reading that you’re on Team Mushrooms as well.
In which case, YOU NEED TO MAKE THESE GARLIC BUTTER MUSHROOMS.
They’re sooooo garlick-y and butter-y and mushroom-y. Yep. I’m making up words over here.
That’s how good they are.

IMG_1881

There are five (count ’em!), FIVE simple ingredients to make this dish.
Two of them are salt and pepper.
Do those even count? No? So really just 3 ingredients, then.
Garlic + butter + mushrooms = magic.

The big trick with the mushrooms comes to cleaning them.
You probably already know this, but you can’t rinse them under water.
Instead, you need to use a wet paper towel and gently wipe down each one.
It’s a little time consuming, but it’s worth it in the end!

IMG_1880 (2)

Two more things to note about the recipe:
#1: Trim the ends of the mushrooms so they’re flat and even with the rest of the mushroom. This will help the garlic stay on top of them instead of falling in between them.
#2: You will want to mince up your garlic as tiny as you possibly can so it’ll stay on the mushrooms.

5 Ingredient Easy Garlic Butter Roasted Mushrooms

Ingredients:

  • 16 oz white or baby bella mushrooms, cleaned with a wet paper towel
  • 1/4 cup butter (I used KerryGold grass-fed butter, but you can even make them vegan by using Earth Balance!)
  • 4 cloves of garlic, minced as finely as you can
  • salt
  • pepper

1). Place a large cast iron skillet in the oven and preheat it to 400F. If you do not have a cast iron skillet, you can use a pie pan or a casserole dish, but you will not preheat the oven with either of those inside.
2). Using a small knife, trim the ends of the mushrooms so they’re flat and even with the rest of the mushroom. Remove the cast iron skillet from the oven and carefully arrange the mushrooms in it.
3). Place the butter and garlic in a microwave safe bowl and microwave for about 30 seconds or until melted. Spoon the garlic butter over each mushroom cap. Make sure to try to keep the garlic on top of the mushroom instead of letting it fall in between. Season the tops with salt and pepper.
4). Roast for about 25-30 minutes until tender, basting them about halfway through the cooking time. Serve and enjoy!

Servings: 4. Approximate Nutritional Information per Serving: Calories: 131 Carbs:5g Fat: 12g Fiber: 1g Protein: 4g Points+:4 Recipe originally from here

Butternut Squash Soup (GF, DF, Paleo) — Guest Post

IMG_1527

Today I’m posting a delicious, healthy butternut squash soup recipe over on Vylette. I met Julie, the author behind the blog, at the Maiedae mixer a couple months ago and have stayed in touch ever since! Julie has such a warm, inviting personality and I’m so glad we started chatting at the mixer. She’s one of those people you can instantly connect with. I am honored she asked me to post on her blog. Her posts are always beautiful and inspiring!

Since we’re still in Thanksgiving-countdown mode, I wanted to share an easy recipe you just might not have thought of yet that would be perfect for the holiday: butternut squash soup! I make it several times each fall and it is naturally gluten free, and can easily be made dairy free, paleo, vegetarian, and vegan! Hooray for addressing everyone’s dietary concerns!

Click here to check out the full recipe and see all of the wonderful posts Julie has on her lifestyle blog!

IMG_1538

Questions? Comments? Let me know!

Roasted Tomato, Basil, and Garlic Sauce.

An easy, home-made version of my favorite jarred marinara sauce made with roasted tomatoes, garlic, onion, carrots, and fresh basil!

IMG_1422

I’m pressing pause on the apple, cinnamon, pumpkin-everything recipes, even though we’re a few days away from the official start of fall. My garden is exploding with beautiful summer fruit (now more-so than ever!), and I bet I’m not the only one!

If you follow me on Instagram, you know this year was my first year planting a garden, and you also know I recently harvested dozens of tomatoes. Until now, I’ve been able to pick a couple tomatoes from the garden each day ad incorporate them in simple caprese or garden salads. Last weekend was a game-changer! I had two buckets full of tomatoes and I realized I was going to have to use them up in a large quantity all at once.

IMG_1410
I asked for your opinion on what I should make. Some said marinara, some said salsa, and some said gazpacho. Having spent time in Spain, I loooove gazpacho and was ready to make it until I realized I would be the only one in my family eating it. I was leaning toward marinara sauce, but I dreaded having to peel so many tomatoes. I know the trick about blanching them in boiling water, but it still seemed overly time-consuming. I wanted big flavor without slaving away in the kitchen all day, ya know?

Thankfully, an extended family member suggested an easier alternative to marinara sauce that included roasting the tomatoes first (hooray for not peeling tomatoes!!!). I tweaked her recipe a little bit and included carrots for some sweetness with the onion and garlic.

IMG_1418

Oh, and I roasted a WHOLE head of garlic for this recipe. I’m glad I did, because the garlic flavor was still subtle even with the large quantity I used! Have you ever roasted garlic before? I hadn’t either–but it is SOOOOO easy. Much faster than having to take out individual cloves. Are you ready? It’s done in 3 steps

1). Cut the top (pointy) side of the garlic bulb about 1/3 of the way down, so the tops of the garlic cloves are exposed.

2). Drizzle with olive oil, salt, and pepper.

3). Wrap in foil and place in the oven. Ta-da!

IMG_1406

I am probably going to be roasting garlic for everything now! The little garlic foil packet roasted right on the oven rack next to my giant pan of tomatoes and veggies for about 40 minutes. More room on my baking pan = more tomatoes get used!

IMG_1398

When the liquid in the veggies has evaporated and all the tomatoes are shriveled up (lovely imagery, no?), you know they’re ready to take out. For me, that was about 40-45 minutes at 400F. Let them cool a little bit and then get out the food processor.

IMG_1402

Seriously, I love my food processor. It makes fancy sauces so easy. If you don’t have one, use a blender. Scraaaaaaaaaaape all that yummyness off the pan, straight into the food processor. Don’t forget about the garlic!! The cloves are soft and easy to squeeze out, so add them all to the big roasted veggie party. Did I just call it a party? Yes I did.

IMG_1411

Taste and add whatever you think would be good: balsamic vinegar, more olive oil, parmesan cheese, more seasoning, a touch of sugar, fresh basil, etc. I love basil in my sauce, so I added a small handful of leaves and processed them together. My sauce was thick (which I actually like), but you can thin yours out with more olive oil if you prefer a looser sauce.

IMG_1424

What do you like to do with fresh tomatoes? Let me know in the comments!

Roasted Tomato, Basil, and Garlic Sauce

Yield: about 2 cups.

Ingredients:

  • 1/2 large onion, roughly chopped
  • 1 carrot, chopped
  • 1-2 dozen chopped tomatoes, depending on size. (I used cherry and regular tomatoes, enough to fill 1 large baking sheet)
  • 3 tbsp olive oil
  • Freshly cracked sea salt and pepper
  • 1 whole garlic bulb
  • Fresh basil (I used about 8 leaves)

1). Pre-heat the oven to 400F. For the roasted garlic: cut off about 1/3 of the top of the garlic bulb (pointy side). Cut enough so the tops of the garlic cloves are now exposed. Place on foil, drizzle with a little bit of olive oil, salt and pepper. Wrap up tightly and bake directly on the oven rack with the tray of tomatoes.

2). Place the chopped tomatoes, carrot, and onion on a large baking sheet. Drizzle with olive oil, salt, and pepper. Toss to combine. Bake for 40-45 minutes or until most of the liquid has evaporated.

3). Remove the garlic and veggies. Let them cool about 15 minutes before scraping into the food processor. Add a small handful of fresh basil. Pulse until smooth. Taste and re-season, if necessary. You may need to add more olive oil for a looser sauce, balsamic vinegar for tang, sugar to sweeten, or more basil based on your preferences!

Recipe courtesy of Audrey’s Apron. Thanks to family for the inspiration!!


Thai-Inspired Hydrating Cucumber Salad with Roasted Chickpeas

This crisp, cool cucumber salad is sure to help you cool off during the hot summer months! Topped with crunchy roasted chickpeas and peanuts, this dish can be a meal in itself.

IMG_1103

Summer heat is in full-swing here in Georgia! I love everything about summer: the long days, the time we spend outside, the fresh veggies from our garden, and even the heat! Having said that, it’s soooo important to stay hydrated when it’s this hot outside. Drinking lots of water is key, but did you know the food you eat can help keep you hydrated as well? That’s where this cucumber salad comes in! It’s refreshing, crisp, cool, and hydrating. The flavors are (you guessed it!) thai-inspired, but you’ll like this even if you don’t like thai food. Remember–it’s not thai food, it just has some common ingredient combinations you would find in that type of cuisine. Cilantro, red bell peppers, peanuts, etc. Quick confession: thai food is not my absolute favorite, but I loved this salad!IMG_1106

If you’ve got cucumbers growing in your garden, this is a great way to use a couple of them. In my opinion, they’re the focal point of the salad. To get the salad going, the cucumbers, red onion, red bell pepper, and cilantro all take a nice swim in a rice wine vinegar marinade. They need about 30 minutes to allow the flavors to come together, which is the perfect amount of time to finish making the roasted chickpeas, if you want them. The chickpeas are totally optional here. They add a big crunch factor and an extra 7g of protein per serving, but my husband actually preferred it without them. It’s up to you!

IMG_1100

If you want to make the chickpeas, you’ll need 1 can of them. Rinse, drain, and dry them before tossing them with olive oil and spices. Lay them on parchment paper and roast for about 30 minutes, depending on your oven. These actually make a great little snack on their own!

IMG_1105

Thai-Inspired Hydrating Cucumber Salad

Ingredients:
For the marinade:

  • 1/2 cup seasoned rice vinegar
  • 1.5-2 tbsp sugar (this is a must to offset the strong tang from the vinegar)
  • 1/2 teaspoon sea salt

For the salad:

  • 2 cucumbers
  • 1 red bell pepper
  • 1 cup diced red onion
  • 1/4 cup chopped cilantro
  • 1/4 cup chopped roasted peanuts for garnish
  • Roasted spiced chickpeas (optional)

For the roasted chickpeas:

  • 1 can (15 oz) can chickpeas, rinsed and drained
  • 1/2 tsp olive oil
  • 1/2 tsp sea salt
  • 1/2 tsp garlic powder
  • 1/4 tsp chili powder
  • 1/4 tsp ground ginger
  • 1/4 tsp cumin
  • 1/8 tsp turmeric (I omitted)

1). Preheat the oven to 400F and line a baking sheet with parchment paper. Rinse and drain the chickpeas. Roll them in-between two paper towels to make sure they are completely dry before proceeding, otherwise they will not get crispy.

2). In a medium bowl, combine the chickpeas with the olive oil and spices. Toss well to ensure even distribution of the spices. Roast for 20 minutes before stirring them around. Roast for another 10-15 minutes or until the they’re golden brown and lightly charred on the bottom.

3). While the chickpeas roast, whisk together the seasoned rice vinegar, sugar, and salt in a large bowl.

4). Peel the cucumbers, chop off the ends, and slice them in half lengthwise. Using a spoon, carefully scoop out the seeds from each half of the cucumbers and discard the seeds. Slice the cucumbers thinly into half-moon shapes.

5). Toss the cucumbers, red onion, bell pepper, and cilantro in the dressing. Let them sit in the fridge for 30 minutes to marinade while the chickpeas finish cooking. Let the chickpeas rest about 5 minutes before adding to the salad. Top with roasted peanuts. Enjoy!

Servings: about 3 as a main dish, or 6 as a side dish. Approximate nutritional information for 1 main dish serving: Calories: 275 Carbs: 40.5g Fat: 6.9g Protein: 12.7 g Fiber: 9.5g Points+: 7

Recipe adapted from: http://ohsheglows.com/2013/06/05/thai-inspired-hydrating-cucumber-salad-with-roasted-spiced-chickpeas/


Crispy Parmesan Roasted Potatoes.

These potatoes are a perfect side dish to accompany any meal! They’re tossed in olive oil, grated parmesan, and spices, then roasted until crispy. Sure to be a family favorite!

IMG_1118

Everyone loves potatoes, am I right? Kids love ’em, adults love ’em, and they’re usually the first to go at pot-lucks (or the dinner table). Potatoes + parmesan cheese = awesomeness. It’s no wonder my parmesan upside down potatoes and roasted parmesan sweet potatoes are always the most viewed posts on the blog! So, I combined some of the things I absolutely love from those two recipes into one to create these crispy parmesan roasted potatoes.

IMG_1121

This recipe is quite simple. You’ll need some spices, olive oil, grated parmesan, and, of course, potatoes. I used baby red potatoes (with the skin on), but yukon gold would be perfect here too. Chop the potatoes in about 1 inch cubes, and do your best to ensure they’re uniform for even cooking. The smaller the pieces, the quicker they’ll cook through and crispen up for you.

IMG_1117

Mix all the ingredients together in a big bowl and spread them on parchment paper. I typically cover my baking sheets with foil, but I do not recommend it here. Even if you spray the foil with cooking spray before baking, you will likely have some potatoes stick, which is less than ideal. Parchment paper eliminates that worry and still makes for super easy clean-up like foil does. Trust me–use parchment paper!
IMG_1114

Every 10-15 minutes while the potatoes are cooking, give them a quick stir to make sure they’re roasting evenly. This will prevent them from getting crispy on the bottom alone. You’re cooking at a fairly high temperature (425F), so stirring them regularly is important. For me, it took about 35 minutes for my potatoes to cook through and attain that crispy exterior we all love. It was the perfect amount of time to get the rest of the meal together while the potatoes finished up!

IMG_1122

When the potatoes are golden brown and crispy, pull them out of the oven and season them with an extra hit of salt, pepper, and parmesan cheese. Yum!

Crispy Parmesan Roasted Potatoes

Ingredients:

  • 4 cups baby red potatoes, skin on, cut into 1 inch cubes
  • 3 tbsp EVOO
  • 1/2 tsp garlic salt
  • 1/2 tsp sea salt
  • 1 tsp freshly cracked pepper
  • 1/2 tsp paprika
  • 4 tbsp freshly grated parmesan cheese, divided

1). Preheat the oven to 425F. Line a baking pan with parchment paper. Set aside.

2). In a large bowl, combine the chopped potatoes with olive oil, garlic salt, sea salt, pepper, paprika, and only 2 tablespoons of parmesan cheese. Mix well to ensure each potato is evenly coated. Transfer to the prepared baking sheet, moving the potatoes around until they are in one even layer.

3). Bake for 15 minutes. Remove from the oven and mix. Bake for an additional 25-30 minutes, mixing every 10 minutes, until the potatoes are soft in the middle but crispy on the outside. Every oven is different so watch them carefully. Remove from oven and sprinkle the last 2 tablespoons of parmesan cheese on them before serving.

Servings: about 8 servings of 1/2 cup each. Approximate Nutritional Information per Serving: Calories: 114 Carbs: 12g Fat: 6g Protein: 3 Fiber: 1 Points+: 3
Recipe courtesy of Audrey’s Apron.

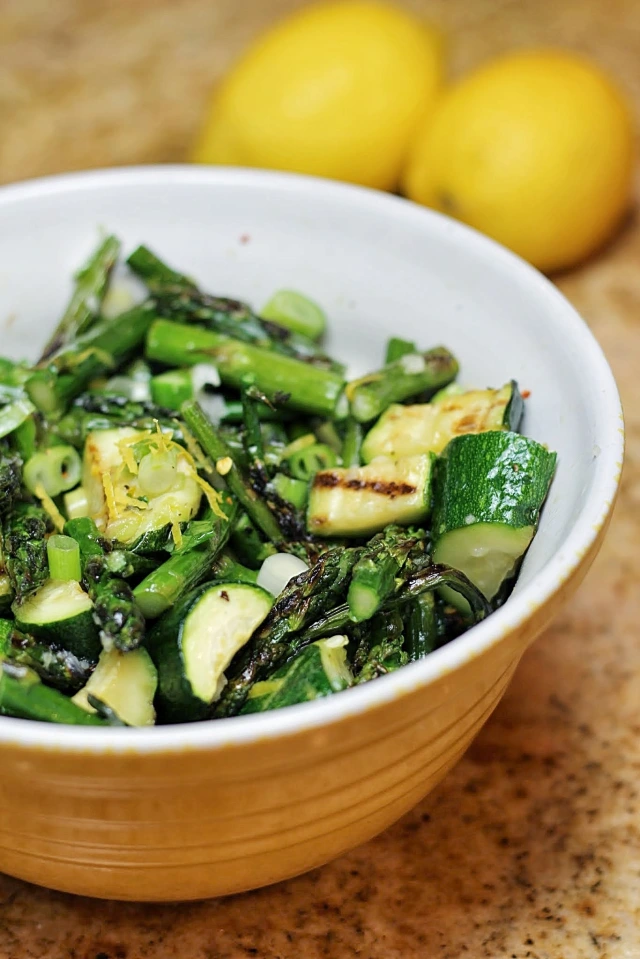
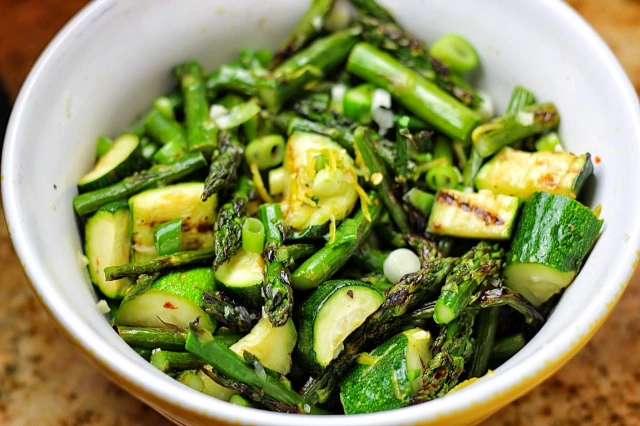
Grilled Asparagus and Zucchini Salad with a Lemon and Basil Vinaigrette.

Fresh asparagus and zucchini are grilled to perfection, then tossed in a lemon and basil sauce with tangy garlic, scallions, and red pepper flakes. 

IMG_1001-001

I love this salad because it is a great way to use extra zucchini and basil, which are both in season right now and growing like crazy in my garden. If you follow me on Instagram (audreysapron) or Twitter (@AudreysApron), you’ve seen my excitement over the success of my first-ever veggie garden. Whether you’re growing zucchini or not, it’s a great time to cook with it because, as I said before, it’s in season, which makes it more affordable to purchase in store.

IMG_0971

This side dish comes together fast, making it perfect for a weeknight meal. In fact, I made this while we were on vacation. As much as I love cooking, I didn’t want to spend hours in the kitchen on our trip, so I paired this with some grilled chicken. Gotta love summer eats!

IMG_0969

Have you ever grilled asparagus? I love asparagus roasted, but (sadly) I had never thought to grill it until now. If you haven’t tried it, you’re missing out! This is definitely my new favorite way to prepare it. Just as easy as roasting, and just as flavorful (if not more so!).

IMG_0964

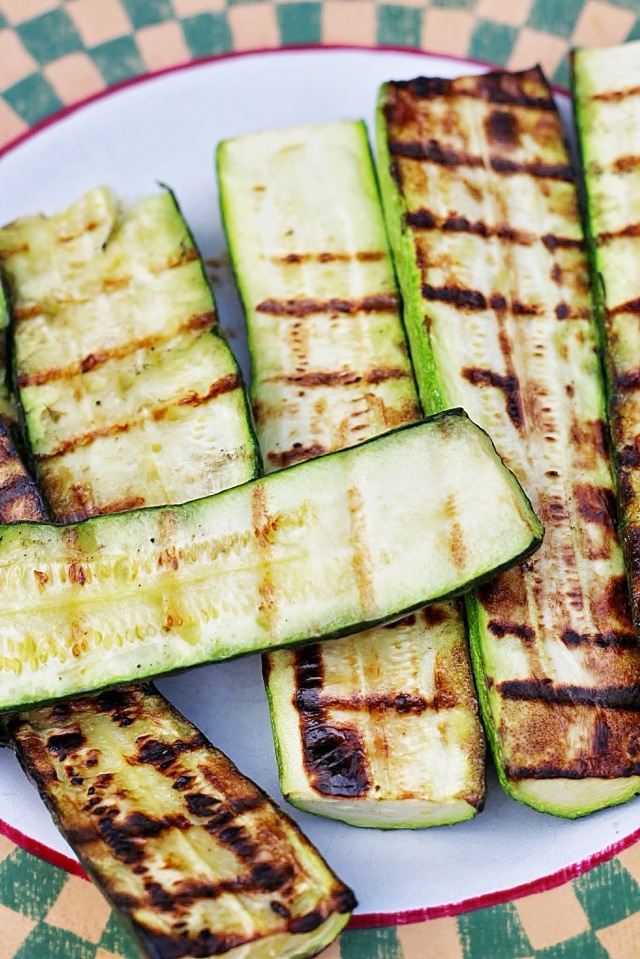
On to the recipe! Fire up the grill and toss the zucchini and asparagus in a little oil, salt, and pepper. The zucchini takes longer to cook, so put it on first, followed by the asparagus a few minutes later. While the veggies are cooking, whisk together some lemon juice & zest, olive oil, garlic, fresh basil, scallions, and red pepper flakes. Don’t worry–this dish is not spicy. The red pepper flakes add a tiiiiiny bit of heat, but it’s only 1/4 tsp for the entire bowl, and it’s not very noticeable. In fact, next time I may double that amount. I recommend you taste it and add more if you want it.
IMG_1006-001

Basil is one of my favorite herbs, and I think it pairs nicely with the veggies and lemon. If you prefer to use parsley, oregano, mint, whatever… you can do it. You might even want to get adventurous and try a combination. The important thing to remember is to use fresh herbs. Everything about this salad is fresh and light, and I just don’t think dried herbs would have the same effect. If you’re in a bind, you can actually leave the herbs out completely–it’s still very flavorful on its own!

IMG_0998-001

I hope you make it and enjoy!

Grilled Asparagus and Zucchini Salad with a Lemon and Basil Vinaigrette. 

Ingredients:

  • 1 bunch of asparagus
  • 3 medium zucchini
  • 1 tbsp EVOO
  • Freshly cracked sea salt and pepper

For the vinaigrette:

  • Zest and juice from 1 lemon
  • 1 tbsp EVOO
  • 1 garlic clove, grated or minced
  • 1/4 cup  chopped fresh basil (or herb of choice)
  • 3 minced scallions
  • 1/4 tsp red pepper flakes
  • Freshly cracked sea salt and pepper

1). Heat the grill to medium-high heat. Prepare the asparagus by trimming the ends. Cut the ends off the zucchini and slice in half. Toss in olive oil and season with salt and pepper. Add the zucchini to the grill, flipping after about 6-7 minutes. Add the asparagus and cook for about 5 minutes per side. The zucchini and asparagus are ready when they are easily pierced with a fork.

2). Meanwhile, prepare the vinaigrette. In a bowl, whisk together the lemon zest/juice, olive oil, basil, garlic, scallions, red pepper flakes, salt, and pepper.

3). When the zucchini and asparagus are fork-tender, remove them from the grill and chop into about 1 inch pieces. Add the chopped veggies to the bowl with the vinaigrette and lightly toss to combine. Taste and re-season, if necessary.

Servings: about 6. Nutritional Information per serving: Calories: 82 Carbs: 9g Fat: 5g Fiber: 3g Protein: 4g Points+: 2
Recipe adapted from: http://cookblog.org/grilled-veggies-lemon-herb-vinaigrette/ 

Servings:

Southwestern Grilled Sweet Potato Salad

Last week we went on vacation, and it was glorious! After spending all day in the pool, I wanted to make something light, healthy, nutritious, and colorful. This southwestern grilled sweet potato salad was just the ticket. There are a LOT of textures and flavors going on in this one, folks. It’s a definite winner!

IMG_0947
Let’s deconstruct this giant rainbow bowl, shall we?

IMG_0928
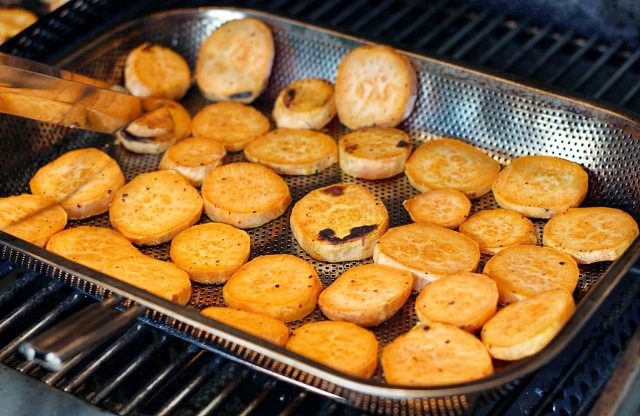
The focal point of this salad is the grilled sweet potatoes. Yum. I cut them in big rounds to make them easy to grill, and then quartered them after grilling. Do you have to grill them? Absolutely not. It’s hot here in the south, so grilling means the heat stays outside the kitchen, which is important when it’s in the 90’s! I actually think roasting the potatoes would be equally good (if not better), so if you don’t have a grill I would recommend trying that option. If you do that, you can go ahead and quarter the sweet potatoes before baking. IMG_0945
Bright yellow corn, tasty black beans, and a crisp red bell pepper provide a nice contrast in texture to the grilled sweet potatoes. Top all that off with vibrantly green onions, creamy avocado, and fresh cilantro, and you have a bowl full of color. The last step is to toss it all together with fresh lime juice, salt, and pepper, and you’re ready to eat!

IMG_0940
Simply put, this is an awesome side dish (or main dish for the non-meat eaters!) that will definitely make another appearance in our home. My husband, who does not like avocados, loved this dish. When it all comes together, it’s just that good!! Take this to your next cookout or picnic!

Southwestern Grilled Sweet Potato Salad
Ingredients:

  • 4 medium sweet potatoes, peeled and cut into 3/4 inch slices
  • 1 tablespoon olive oil
  • 1 can corn, rinsed and drained
  • 1 can black beans, rinsed and drained
  • 1 red pepper, diced
  • 2 green onions, chopped
  • 1/2 cup chopped cilantro
  • 2 avocados, pit and skin removed, chopped
  • Juice of 2 limes
  • Salt and pepper, to taste

1). Pre-heat the grill. Toss the cut sweet potatoes in olive oil, salt, and pepper. Grill them over medium-high heat until they can easily be pierced with a fork (about 8 minutes each side).

2). In a large bowl, combine the corn, black beans, red pepper, green onions, cilantro, and avocados. Once the sweet potatoes are cooked through, quarter the rounds and add them to the bowl. Add the lime juice, salt, and pepper. Toss to combine. Taste and re-season, if necessary.

Servings: 4 as a main dish, 6-8 as a side. Approximate nutritional information for 8 servings: Calories: 234 Carbs: 34g Fat: 9g Protein: 8g Fiber: 10g Points+: 6 

Recipe adapted from: http://www.twopeasandtheirpod.com/southwestern-grilled-sweet-potato-salad/ 

From the Archives: Parmesan Roasted Green Beans

Parmesan roasted green beans are an easy side dish that can accompany chicken, fish, steak, pork, or any dish! The simple roasting method brings out the best in the green beans, giving them a unique flavor and delightful texture. No bland, mushy green beans here!IMG_0839

The first time I roasted green beans was life-changing; I never knew they could taste so good! My husband and I don’t particularly care for the green veggie unless it’s roasted. The texture and flavor completely changes so that even green-bean haters love them this way!

IMG_0838

I originally posted this recipe last year in conjunction with my easy crock pot bbq chicken, but this simple recipe deserves its own post. For the last couple years this has been my tried-and-true green bean recipe, and we wouldn’t have it any other way! Trust me, if you haven’t roasted green beans yet, you must try them. And then let me know how they turn out. I promise they’ll win you over this way!

IMG_0834

Sometimes I’ll add a sprinkle of parmesan cheese when I take the pan out of the oven, and sometimes I won’t. The parmesan adds another dimension of flavor and saltiness, but if you don’t have any or are cutting out dairy for dietary reasons, they’re still delicious as-is.

IMG_0833

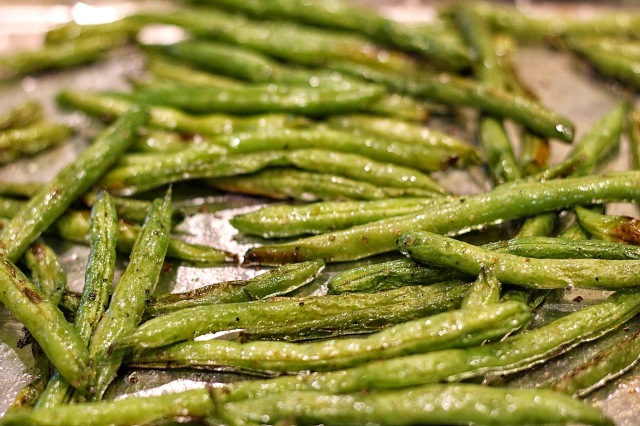
They key is to season them well. Season with quite a bit of freshly cracked pepper, sea salt, and garlic powder before baking, then taste one out of the oven and re-season, if necessary. I like to season them once they’ve been tossed in olive oil and are laying flat on the baking sheet because I feel it gives me better control, but you can also season them as you combine them with the oil.

One last trick I use: I always cover my baking pan in foil for virtually no clean up. I lightly spray it with cooking spray before adding the green beans. Works every time!

Parmesan Roasted Green Beans

Ingredients:

  • 12 oz green beans, washed and dried
  • Sea salt
  • Freshly cracked black pepper
  • Garlic powder
  • 2 tsp olive oil
  • 1-2 Tbsp shredded parmesan cheese (optional)

1). Preheat oven to 425F. Line a pan with foil for easy clean up. Mix the green beans with olive oil, then season with salt, pepper, and garlic powder to taste. Make sure they are all in one even layer on the pan.

2). Bake for 10 minutes. Mix the beans lightly and bake for an additional 5-7 minutes. Sprinkle with shredded parmesan cheese (optional).

Serves: about 4. Nutritional Information per serving: Calories: 62 Fat: 2.9g Carbs: 8g Protein: 2.7g Sodium: 38g without salt

Recipe adapted from: http://www.skinnytaste.com/2011/11/roasted-parmesan-green-beans.html


“Black & Blue” Spring Salad with Blackberry Balsamic Vinaigrette.

It is finally feeling like spring around here! As soon as the weather turns warmer, I immediately turn to cool, crisp salads to keep my meals light and filling. I love salads and eat them year-round, but somehow when it’s freezing outside the idea of biting into a cold piece of lettuce does not appeal to me as much!

Salads can get really boring, really fast. The trick to keeping them from becoming mundane is (obviously) change! Change the base of your salad (baby spinach, romaine, spring mix, etc.). If you like cheese, change what type of cheese you add. Change what vegetables you include. Change what crunchy add-ins you include. Change the dressing. And in this case, change it up completely by adding fruit!

IMG_20140403_191236048

I love ripe, juicy fruit in my salads and usually stick to strawberries, blueberries, apples, or pineapple. Until now, I had never included blackberries! They were perfect in this salad. They were tart but sweet, and off-set the bite from the blue cheese perfectly. I added a few sliced almonds for added crunch, too.

And then, of course, there’s the dressing. It’s the real star of the show (and of this post)! To play up the blackberry flavor more, I topped the salad off with a blackberry dressing. It was quick to make, easy, and had the right balance of sweet and tangy. It’s sweetened with honey and a touch of sugar. I tried it without the sugar and my face immediately puckered–way too tart! I usually try to eliminate added sugars, but in this case the dressing  most definitely needs it. A scant 1 tablespoon is all that’s needed, though, which turns out to be less than a teaspoon per serving. Not too bad!

I love the deep color of the blackberry dressing–so pretty! All I had in the fridge was romaine lettuce, but I think this dressing would be even more beautiful among the deep green of spring mix or baby spinach! Use your favorite, or whatever you have on hand.

IMG_20140403_191224374
“Black & Blue” Spring Salad with Blackberry Balsamic Vinaigrette

For the salad: 

  • 4-5 cups of your favorite salad base (romaine, spring mix, baby kale, etc.)
  • 1/4 cup blue cheese*
  • 1/4 cup sliced almonds
  • 1 cup fresh blackberries

For the blackberry balsamic dressing:

  • 1/2 cup fresh blackberries
  • 1 tbsp sugar
  • 2 tbsp balsamic vinegar
  • 2 tbsp EVOO
  • 1 tbsp honey (or agave nectar)
  • salt and pepper

1) To make the dressing: Add the blackberries and sugar to a food processor and process until smooth. Add the vinegar, olive oil, honey, salt, and pepper and process again until smooth.

2) To assemble the salad: in a large bowl, add the greens, blue cheese, sliced almonds, and blackberries. Top with blackberry balsamic vinaigrette. Enjoy!

*Note: to make it vegan, use agave nectar in place of honey and do not include the blue cheese!*

Servings: 4. Nutritional information per serving for the dressing: Calories: 105 Carbs: 10g Fat: 7g Sugar: 10g Fiber: 1g WWPoints+: 3

Nutritonal information per serving for the salad base: Calories: 91 Carbs: 5g Fat: 6g Protein: 4g Sugar: 2g Fiber: 3g WWPoints+: 2

Recipe adapted from: http://iowagirleats.com/2014/04/02/black-blue-spring-salad-with-honey-roasted-pecans-and-berry-balsamic-vinaigrette/  


Creamy Cauliflower Alfredo (No Cream!)

When I first stumbled upon this recipe, I thought there was NO way a cauliflower sauce could even come close to tasting like alfredo. But then I read the reviews. And then a few weeks later, a friend of mine at church made it and raved about it. And then I made it, and fooled my husband into thinking it was alfredo sauce. A demolished bowl and a half of pasta later, he kept going on and on about how good it was, never once suspecting the main ingredient to be cauliflower. Folks, this recipe is pretty unbelievable. Cauliflower CAN in fact become a delicious alfredo sauce!

IMG_20130726_200337

Traditional alfredo sauce is notorious for being really unhealthy. Full of butter, cream, and lots of cheese, it’s just not friendly to your waistband. Although there is a little bit of butter and cheese in this recipe, it is greatly reduced: only 2 tablespoons for 10 cups of sauce! It’s enough to add that great flavor that will fool your family into thinking it’s regular alfredo sauce, but not enough to derail you off your healthy eating. By the way, did you catch that…this makes 10 cups of sauce!! It’s perfect for large families, but if you’re cooking for 2 like I am, you can freeze as much of the sauce as you want! Win-win.

IMG_20130726_200321

I served this over pasta for my husband, but I added it to brown rice and it was so good. It’s an easy way to add a lot of flavor for little calories…in fact, just 58 in a half cup serving! You can also use this to replace any recipe that calls for jarred alfredo sauce.

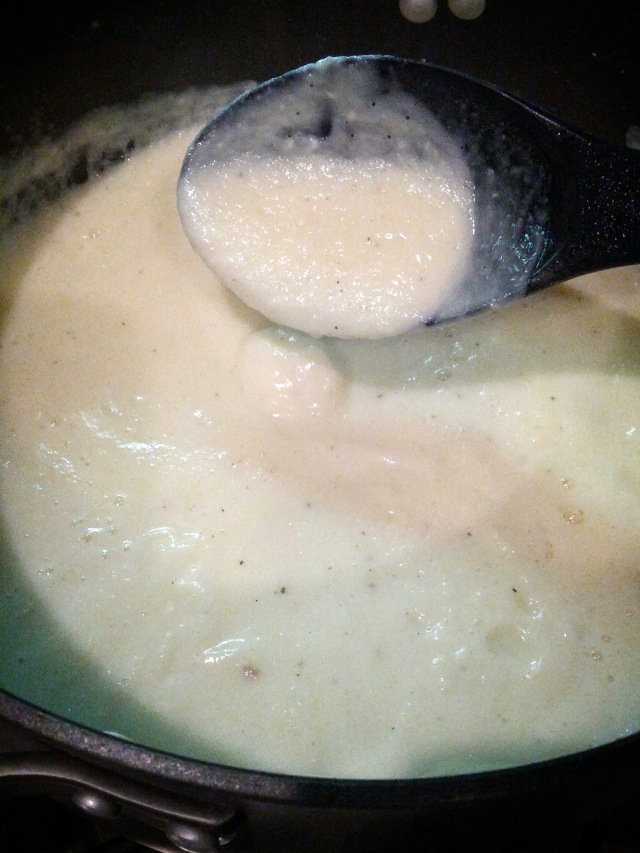
I used my immersion blender for this but I am including directions for a regular blender as well. The steps are basically the same, but depending on the size of your blender you may need to do this in batches.

Creamy Cauliflower Alfredo Sauce

Ingredients:

  • 8 large cloves garlic, minced
  • 2 tablespoons butter
  • 5-6 cups cauliflower florets (I used one large head of cauliflower)
  • 6-7 cups vegetable broth or water (I used a little of both)
  • 1 teaspoon salt (more to taste)
  • ½ teaspoon pepper (more to taste)
  • ½ cup milk (more to taste)
  • 2 tbsp grated parmesan cheese (optional, can also add more)

1). Heat the butter in a large non-stick pan over low heat. Add the garlic and cook for several minutes until soft, but not brown. Remove from heat and set aside.

2). In a large pot, bring the vegetable broth or water to a boil over high heat. Add the cauliflower florets and cook, covered, for about 7-10 minutes or until the cauliflower is fork tender. Carefully drain the cauliflower, reserving about 2 cups of broth!

If using an immersion blender: Add 1 cup of broth back to the pot with the cauliflower, sauteed garlic/butter, salt, pepper, and milk. Puree with immersion blender, adding more broth/milk depending on how thick you would like the sauce to be. Stir in parmesan cheese (if using), and season with salt and pepper to taste.

If using a regular blender: Add the cauliflower, 1 cup of broth, sauteed garlic/butter, salt, pepper, and milk. Blend for a few minutes until the sauce is very smooth, adding more broth/milk depending on how thick you would like the sauce to be. Stir in parmesan cheese (if using) and season with salt and pepper to taste.

3). Serve hot over pasta, brown rice, or use in lasagna, etc. Refrigerate or freeze leftovers. Enjoy!

Note: original recipe mentions adding additional olive oil to smooth out the sauce. I did not find this necessary but you can add it if you’d like!

Yield: 5 cups. Serving size: 1/2 cup. Nutritional Information per 1/2 cup: Calories: 58 Carbs: 6g Fat: 3g Fiber: 3g Protein: 2g WW Points+:2

Recipe adapted from: http://pinchofyum.com/creamy-cauliflower-sauce