Taco Stuffed Squash (or Zucchini) Boats.

Squash boats nestled in salsa, filled with zesty taco meat, and topped with cheese. A new twist on taco night!

IMG_1246
Everyone loves tacos, right? Right. This recipe is a new take on a taco, and a great way to get in a serving of vegetables. Same taco flavor you love and expect, just using a healthier, gluten-free alternative. I used yellow squash because I had a ton, but if you have zucchini feel free to use that instead! My husband doesn’t love yellow squash but he went back for seconds on this dish!

IMG_1251

The meat in the boats is really flavorful due to a low-and-slow simmer in a homemade taco seasoning. Fear not–homemade does not have to equal complicated! It’s made with just cumin, chili powder, paprika, oregano, garlic powder, salt, and pepper. There’s no need for a taco seasoning packet filled with all sorts of additives when making your own is this simple! Chances are you already have those spices sitting in your pantry right this very moment.

IMG_1248

To make the squash into “boats”, you have to spoon out the seeds in the middle. You can’t do this easily without cooking the squash first. Lucky for you I tried that method to see if I could skip a step and the answer is clear: NOPE! If you’re using zucchini, you might be able to do this with a melon baller while they’re raw. Regardless, you need to cook the boats before you stuff them because the final bake in the oven is not going to be long enough to cook them start to finish.

So, you have two options:

  1. Boil the squash halves in a pot of water for a few minutes.
  2. Bake the squash cut-side-down on a pan at 400F for about 12-15 minutes.

I prefer the second option for many reasons:

  • It gives me time to cook the meat mixture while they’re baking, so I don’t have to multi-task too much.
  • I actually think it enhances the flavor because you sprinkle them with oil, salt, and pepper before baking.
  • I’m going to preheat the oven to 400F anyway, so that’s not an inconvenience.
  • It reduces the final bake time because they’re more cooked through with this method.
  • And finally, covering the pan with foil = no clean up, while boiling in water = a pot to clean up.

Let’s be honest, that last point was the real reason. : )

But, if you’d rather boil the halves then go for it! Either way, let them cool before you scoop out the seeds in the middle.

IMG_1253

Would you try this? Does your family have a taco night? Let me know in the comment section below. I see a lot of “Taco Tuesday” posts on social media. I love experimenting in the kitchen a liiiiiiittle too much to dedicate an entire meal every week to the same dish, but I can definitely see the appeal!

Taco Stuffed Squash.

Ingredients:

  • 4-6 squash or zucchini depending on size (I had a couple tiny ones so I used 6), cut in half lengthwise
  • 1/2-3/4 cup mild salsa
  • 1 lb 93% lean ground beef or turkey
  • 1 tsp garlic powder
  • 1 tsp cumin
  • 1 tsp sea salt, or to taste
  • 1 tsp chili powder
  • 1 tsp paprika
  • 1/2 tsp oregano
  • 1/2 small onion, minced
  • 1/2 bell pepper, minced
  • 4 oz can tomato sauce
  • 1/4 cup water
  • 1/2 cup reduced fat Mexican blend shredded cheese
  • 1/4 cup chopped scallions or cilantro, for topping

1). Preheat the oven to 400F. Line a pan with foil and spray with cooking spray. Lightly drizzle squash with olive oil, then sprinkle with salt and pepper. Place the squash face down on the pan and bake for 12-15 minutes, or until fork-tender. Allow them to cool a few minutes until they aren’t too hot to touch, then use a spoon to scoop out the center of each half. Reserve this to add to the meat mixture (optional).

2). While the squash is baking, heat a large skillet over medium-high heat and brown the meat. Add the onion and bell pepper. When the meat is no longer pink, add the spices, leftover squash, tomato sauce, 1/4 cup salsa and water. Stir, cover, and let it simmer for about 15 minutes.

3). Meanwhile, spread about 1/4-1/2 cup salsa in the bottom of a 9×13 baking dish. Arrange the squash boats in the baking dish. Add 1/3 cup of meat to each boat, then sprinkle with about 1 tbsp cheese and some fresh cilantro. Cover and bake for 20-25 minutes or until cheese is melted.

Serving size: 2 halves. Nutritional Information per Serving: Calories: 286 Fat: 12g Carbs: 18g Fiber: 5g Protein: 28g Points+: 7
Recipe adapted from: http://www.skinnytaste.com/2013/07/taco-stuffed-zucchini-boats.html


Zucchini Lasagna (Gluten-Free!).

Thin slices of grilled zucchini take the place of traditional lasagna noodles, and are then nestled in a rich meat and cheese sauce. You won’t miss the pasta one bit!

IMG_1282

See that beautiful green peaking through the lasagna? That’s the zucchini. I realize many of you have got to be really skeptical at this point. Zucchini for lasagna noodles?! It sounds crazy, I know, and even I had my reservations about it. I’m pretty sure I looked at my husband at one point while assembling this and told him I had no idea if this was going to turn out well. Thankfully, it did. Not only did it turn out well, it was awesome!! He’s not a huge fan of zucchini and really loved this one too. With lots of meat and cheese, what’s not to love? Yum.

IMG_1286

For those of you who follow me on instagram (if you don’t, you should!), you may recall I recently had a tiiiiny kitchen incident earlier this week involving a knife and 3 of my fingers. A record, to be sure. This recipe was worth it, though. It just goes to show you everyone can have one of those days in the kitchen, and you need to be careful with sharp knives. Which, by the way, you’ll need a sharp knife or a mandoline to achieve these thin slices of zucchini you’ll use to replace the noodles. Just be careful and don’t do what I did. : )

IMG_1270
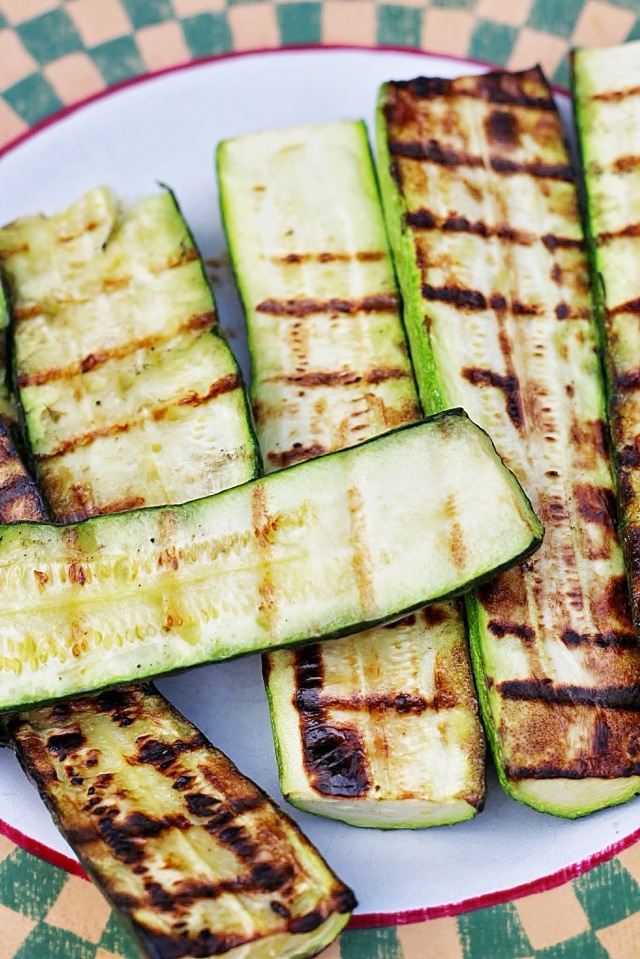
Once they’re thinly sliced (you’re going for about 1/8-1/4 inch slice), sprinkle some salt on ’em to draw out excess water, pat them dry, and grill them up on an indoor or outdoor grill. These slices are so thin that they’ll be ready within 1-2 minutes per side. My indoor grill took a little longer than that on some of my slightly thicker slices, but just pierce them with a fork to test if they’re done. They’ll look something like this:

IMG_1273

I had 3 small zucchini, and it ended up not being enough for the layers, so I did the above steps with 2 small yellow squash and added it in the middle layer, which worked out great. So, if your garden is exploding with one squash and not the other, you can certainly substitute yellow squash!

While all of that’s happening, you’ll brown your meat and make a yummy sauce. Then, in another bowl, you’ll mix together ricotta cheese with parmesan and egg. That’s what makes this sauce so creamy and rich tasting. Once everything is ready, start layering! Sauce goes in the bottom of the pan first, followed by zucchini, ricotta mixture, mozzarella cheese, and another layer of sauce. I was able to have 3 layers of zucchini total. The top layer is a little different in that you only add the remaining sauce and mozzarella, no ricotta. This is important because you now know you can use half the ricotta mixture on the first layer, and the second half on the second layer. Make sense? Then once it’s all beautifully assembled, cover it with foil and bake it for about 30 minutes.

IMG_1276

After 30-40 minutes, remove the foil and either let it bake for another 15 minutes until golden brown on top, or turn your broiler on high for a few minutes. This lasagna took a pretty long while to assemble and we were hungry, so I went with the broiler route. Just be sure to keep an eye on it!

IMG_1281

The portion sizes on mine worked out to be equivalent to about the width of 2 slices of zucchini. Pair it with a big salad and you’ve got yourself a really filling meal!

IMG_1283

Zucchini Lasagna (Gluten-Free!)

Ingredients:

  • 1 lb 96% lean beef (or ground turkey)
  • 3 cloves garlic
  • 1/2 onion
  • salt and pepper
  • 28 oz can crushed tomatoes with basil
  • 2 tbsp chopped fresh basil
  • 3-4 large zucchini OR yellow squash, sliced 1/8″-1/4″ thick (I used 3 small zucchini + 2 small yellow squash)
  • 15 oz part-skim ricotta
  • 16 oz part-skin mozzarella cheese, shredded (I did not use the whole bag but you can if you’d like!)
  • 1/4 cup grated parmesan cheese
  • 1 large egg

1). For the meat sauce: Heat a large pan and brown the meat, seasoning liberally with salt and pepper. Add the chopped onion and garlic and cook until translucent. Add the tomatoes, basil, and more salt and pepper. Simmer on low, covered, for about 30 minutes while you prepare the zucchini.

2). Sprinkle a little bit of salt on the thinly sliced zucchini to draw out any excess moisture and after 10 minutes pat them dry with a paper towel. Heat your grill and grill the zucchini slices for 1-2 minutes per side, or slightly longer for any thicker slices you may have. To test if they’re done, pierce them with a fork. They should be easily pierced when cooked through.

3). Preheat the oven to 350F. In a medium bowl, combine the ricotta, parmesan, and egg together well.

4). Spray a 9×13 pan with cooking spray. Begin layering. Spoon some of the sauce on the bottom of the pan, then top with zucchini slices. Add HALF the ricotta mixture on top of this layer, then sprinkle with mozzarella cheese. Add more sauce, zucchini, the second half of the ricotta mixture, and more mozzarella cheese. Top with more sauce, the last layer of zucchini, more sauce, and the last of the mozzarella cheese.

5). Cover with foil and bake for about 30-40 minutes. Remove foil and bake for another 15 minutes or until the cheese is golden-brown. Alternatively, you can turn the broiler on high to achieve the golden brown look quicker (just be sure to keep an eye on it!)

6). Allow the lasagna to rest about 5-10 minutes before serving. Enjoy!

Servings: 8. Nutritional Information per Serving: Calories: 345 Carbs: 16g Fat: 17g Protein: 36g Fiber: 2g Points+: 9
Recipe adapted from: http://www.skinnytaste.com/2009/02/zucchini-lasagna.html 


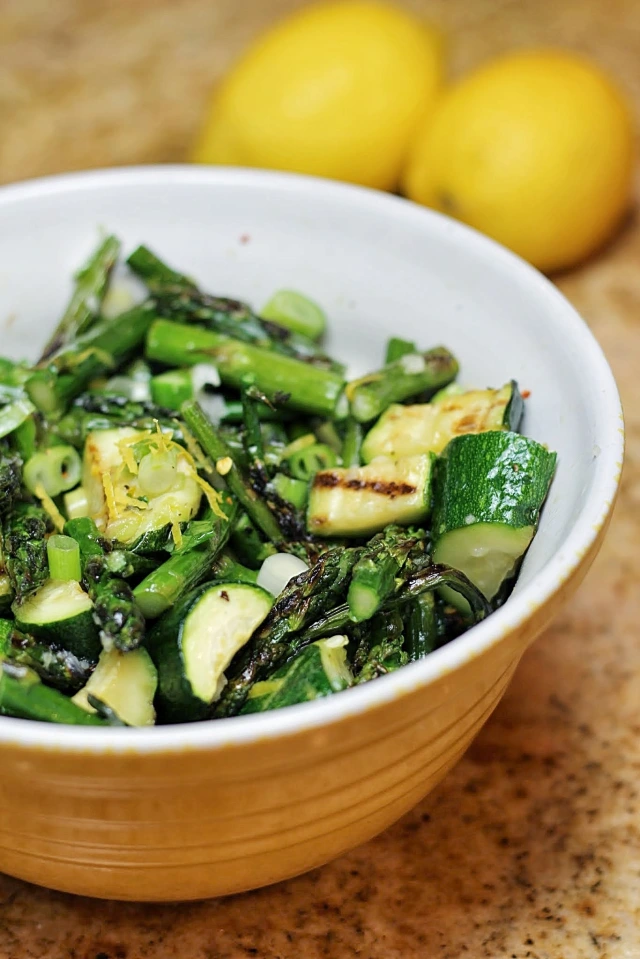
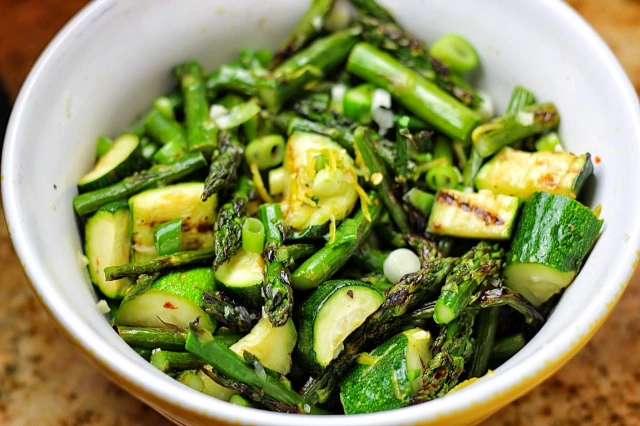
Grilled Asparagus and Zucchini Salad with a Lemon and Basil Vinaigrette.

Fresh asparagus and zucchini are grilled to perfection, then tossed in a lemon and basil sauce with tangy garlic, scallions, and red pepper flakes. 

IMG_1001-001

I love this salad because it is a great way to use extra zucchini and basil, which are both in season right now and growing like crazy in my garden. If you follow me on Instagram (audreysapron) or Twitter (@AudreysApron), you’ve seen my excitement over the success of my first-ever veggie garden. Whether you’re growing zucchini or not, it’s a great time to cook with it because, as I said before, it’s in season, which makes it more affordable to purchase in store.

IMG_0971

This side dish comes together fast, making it perfect for a weeknight meal. In fact, I made this while we were on vacation. As much as I love cooking, I didn’t want to spend hours in the kitchen on our trip, so I paired this with some grilled chicken. Gotta love summer eats!

IMG_0969

Have you ever grilled asparagus? I love asparagus roasted, but (sadly) I had never thought to grill it until now. If you haven’t tried it, you’re missing out! This is definitely my new favorite way to prepare it. Just as easy as roasting, and just as flavorful (if not more so!).

IMG_0964

On to the recipe! Fire up the grill and toss the zucchini and asparagus in a little oil, salt, and pepper. The zucchini takes longer to cook, so put it on first, followed by the asparagus a few minutes later. While the veggies are cooking, whisk together some lemon juice & zest, olive oil, garlic, fresh basil, scallions, and red pepper flakes. Don’t worry–this dish is not spicy. The red pepper flakes add a tiiiiiny bit of heat, but it’s only 1/4 tsp for the entire bowl, and it’s not very noticeable. In fact, next time I may double that amount. I recommend you taste it and add more if you want it.

IMG_1006-001

Basil is one of my favorite herbs, and I think it pairs nicely with the veggies and lemon. If you prefer to use parsley, oregano, mint, whatever… you can do it. You might even want to get adventurous and try a combination. The important thing to remember is to use fresh herbs. Everything about this salad is fresh and light, and I just don’t think dried herbs would have the same effect. If you’re in a bind, you can actually leave the herbs out completely–it’s still very flavorful on its own!

IMG_0998-001

I hope you make it and enjoy!

Grilled Asparagus and Zucchini Salad with a Lemon and Basil Vinaigrette. 

Ingredients:

  • 1 bunch of asparagus
  • 3 medium zucchini
  • 1 tbsp EVOO
  • Freshly cracked sea salt and pepper

For the vinaigrette:

  • Zest and juice from 1 lemon
  • 1 tbsp EVOO
  • 1 garlic clove, grated or minced
  • 1/4 cup  chopped fresh basil (or herb of choice)
  • 3 minced scallions
  • 1/4 tsp red pepper flakes
  • Freshly cracked sea salt and pepper

1). Heat the grill to medium-high heat. Prepare the asparagus by trimming the ends. Cut the ends off the zucchini and slice in half. Toss in olive oil and season with salt and pepper. Add the zucchini to the grill, flipping after about 6-7 minutes. Add the asparagus and cook for about 5 minutes per side. The zucchini and asparagus are ready when they are easily pierced with a fork.

2). Meanwhile, prepare the vinaigrette. In a bowl, whisk together the lemon zest/juice, olive oil, basil, garlic, scallions, red pepper flakes, salt, and pepper.

3). When the zucchini and asparagus are fork-tender, remove them from the grill and chop into about 1 inch pieces. Add the chopped veggies to the bowl with the vinaigrette and lightly toss to combine. Taste and re-season, if necessary.

Servings: about 6. Nutritional Information per serving: Calories: 82 Carbs: 9g Fat: 5g Fiber: 3g Protein: 4g Points+: 2
Recipe adapted from: http://cookblog.org/grilled-veggies-lemon-herb-vinaigrette/ 

Servings:

Chicken Rollatini Stuffed with Zucchini

Zucchini season is coming to an end, and I wanted to share with you one more zucchini-related recipe we enjoyed this summer. This is a thinly sliced chicken breast stuffed with a zucchini, garlic and parmesan mixture, then dipped in an olive oil and lemon mixture, breaded, and baked in the oven until golden brown. These are surprisingly filling!

IMG_20130702_200533

These rollatinis do require a few steps to make, but I promise it is worth the effort! Starting off with thinly sliced chicken breast is key, but you can always pound out a regular chicken breast if you must. In the past, I have made some chicken roll-up recipes that required toothpicks to keep the chicken together, and I am so glad that was not necessary this time! Each chicken breast stayed together perfectly. This unique recipe is a great way to sneak in zucchini for family/friends that typically do not love the vegetable. My husband falls into that category but he ate these zucchini stuffed chicken breasts with no complaints!

IMG_20130702_200524

Hurry and make these before summer comes to an end!

Chicken Rollatini Stuffed with Zucchini

Ingredients:

  • 1 tsp olive oil
  • 4 cloves garlic, chopped
  • 1 1/2 cups (1 medium) zucchini, shredded
  • 1/4 cup + 2 tbsp Romano cheese (or parmesan)
  • 3 oz part skim shredded mozzarella
  • salt and pepper to taste
  • 8 thin chicken cutlets, 3 oz each
  • 1/2 cup Italian seasoned breadcrumbs
  • 1 lemon, juice of
  • 1 tbsp olive oil
  • salt and fresh pepper
  • olive oil non-stick spray

1) Wash and dry cutlets, season with salt and pepper.  Preheat oven to 450°. Lightly spray a baking dish with non-stick spray.

2) In a large skillet, heat oil on medium-high heat. When hot saute the garlic 1 minute, or until golden. Add zucchini, 1/4 cup Romano cheese, salt and pepper and saute about 3-4 minutes, stirring occasionally. Set aside to cool. When cool, add mozzarella cheese and mix to combine.

3) Lay chicken cutlets down on a working surface and spread 3 tbsp of zucchini-cheese mixture on each cutlet. Loosely roll each one and keep seam side down.

4) Combine breadcrumbs and remaining 2 tbsp of Romano cheese in one bowl; in a second bowl combine olive oil, lemon juice, and pepper.

5) Dip chicken in lemon-oil mixture, then in breadcrumbs and place seam side down in a baking dish (no toothpicks needed). Repeat with the remaining chicken. When finished, lightly spraywith oil spray.

6) Bake 25 – 30 minutes. Serve immediately.

Serving size: 1 chicken rollatini. Nutritional information per serving: Calories: 171 Carbs: 7.9g Fat: 6.3g Protein: 20.3g Fiber: 0.9g Sugar: 1.3g 

WW PointsPlus: 4 

Recipe adapted from skinnytaste.com.

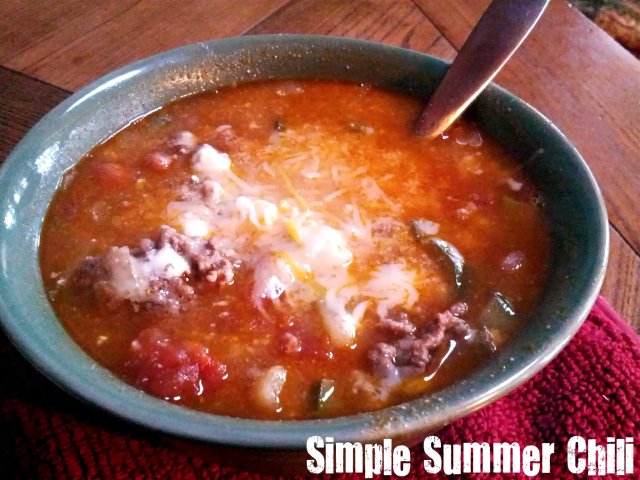
Simple Summer Chili

Chili is traditionally a cold weather favorite, but I love that this recipe incorporates in-season zucchini! This summer has been so rainy that a cozy meal like this one has been a welcomed change to grilling outside.

IMG_20130706_132833

I originally found this recipe from a health and fitness blog I love to read, and this may be my new favorite chili recipe (thanks, Julie!!). The best part is the spice blend–it is PERFECT. It tastes just like the chili seasoning you can purchase in packets at the grocery store, but it is so simple and easy to make yourself! And so much better for you,  too. Ground beef or ground turkey both work well in this recipe–it is completely up to you! You can also use your favorite kind of bean…I like to switch it up between black beans, pinto beans, and kidney beans based on what I have in the pantry.

IMG_20130706_133857

Whip this up for your family tonight! It will certainly be a hit!

Simple Summer Chili

Ingredients:

  • 1 lb lean ground beef or ground turkey
  • 1/2 tbsp olive oil
  • 1 onion, chopped
  • 2 medium zucchini, chopped
  • 1 can low sodium beans (kidney/pinto/black–whichever!), drained and rinsed
  • 1 can diced tomatoes, no salt added (do not drain!)
  • 1 cup beef broth, reduced-sodium and fat free
  • 1.5 tbsp chili powder
  • 1.5 tbsp cumin
  • 1 tsp garlic salt

1). In a large pot, heat olive oil over medium heat. Add chopped onion and zucchini, stirring until tender and opaque. Add ground beef/turkey and stir until meat is browned.

2). Drain any excess fat from pan before adding remaining ingredients. Add as much/little beef broth as necessary to reach the desired consistency. Simmer for 20-30 minutes or until flavors are well blended.

3). Enjoy topped with low-fat cheese, light sour cream, non-fat greek yogurt, or simply as is!

Servings: about 6. Nutritional Information per Serving: Calories: 219 Carbs: 20g Fat: 7g Protein: 22g Sugar: 4g Fiber: 6g

WW PointsPlus: 6

Recipe adapted from: http://www.pbfingers.com/2012/07/23/simple-summer-chili/

Parmesan Roasted Zucchini

Zucchini season is almost here! I have an incredibly easy recipe that is my new favorite way to prepare the vegetable. I can’t think of a single vegetable I don’t like roasted, so maybe this should come as no surprise. My husband is really not a fan of zucchini but agreed this was delicious. The secret is seasoning the zucchini well and sprinkling just a bit of shredded parmesan cheese at the end. It is a perfect accompaniment to chicken, fish, steak, whatever!

IMG_20130430_190722

This recipe is a testament to the fact that when it comes to food, sometimes simple is better. Just a few simple ingredients combined together can be really fantastic! The salty parmesan adds a lot of flavor and the texture of the zucchini after roasting is great. I had to go back for seconds on this one! This simple, easy recipe can be on the table in 30 minutes. Give it a try, even if you normally don’t care for zucchini. You just might surprise yourself!

Parmesan Roasted Zucchini

Ingredients:

  • 4 medium zucchini
  • 1/2 tbsp olive oil
  • sea salt
  • freshly cracked pepper
  • garlic powder
  • 1/4 cup shredded parmesan cheese

1). Preheat the oven to 375F. Spray a cookie sheet (may want to line with foil for easy clean up later). Chop the zucchini in quarters. Toss with olive oil, salt, pepper, and garlic powder. (Note: I like to arrange the zucchini in a single layer on the cookie sheet, then season. I think it ensures even seasoning on each bite!)

2). Bake for 25 minutes. Remove from oven and sprinkle with grated parmesan cheese and serve.

Servings: 4 Nutritional Information per Serving: Calories: 69 Carbs: 7g Fat: 4g Protein: 4g Sugar: 4g Fiber: 2g

WW Points Plus: 2 Old points: 1

Recipe loosely adapted from: http://www.thegingeredwhisk.blogspot.com/2012/06/garlic-roasted-zucchini.html